I recently wrote a post on The Best Way to Interview people. Today I want to go all out, and write an inclusive guide. I am doing this for a few reasons; Interviews are the backbone of any promotional or documentary style video. The importance of getting amazing sound is crucial.
Let’s face it. Most promotional videos are really bad.
There are a lot of promotional videos out there on company websites that I just can’t make it through. How can I devote 90 seconds of my time to learn more about “Smith Marketing” if I instantly hear a robotic drone of, “We can solve all of your advertising problems.” Within the FIRST SECOND of the video?
No thanks.
Think about your favorite movie. Mine is “The Departed”.
Why do you like it?
One common reason among everyone is that you get lost in the movie’s world. You forget about that last Tweet you sent, or a email you received that morning. You are now apart of the storytelling cinema world. Everything goes out the window and your emotional go for a roller coaster ride as you embark on the journey with the protagonist.
This suspension of disbelief MUST apply to your promotional video in today’s world or you will be left behind. Viewers now have the option to watch your video. The days of the loud repetitive used car salesmen commercial are gone (and I couldn’t be happier).
Today we are going to take a look at how to level up your interview game.
Start with the Emotion First
Before you even show up to the location you need to have an idea of what kind of emotion you want the audience to feel.
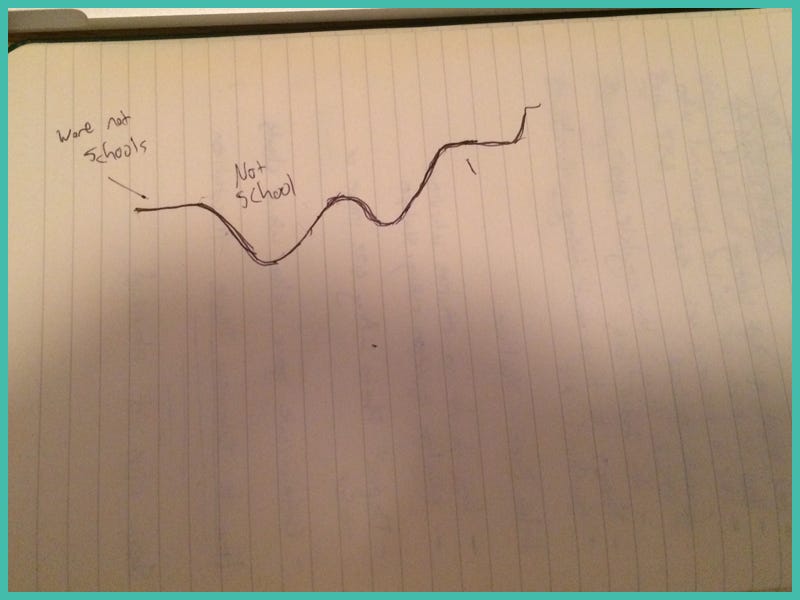
Recently, I was meeting with a client who wanted a video for their company. They have a lot of ambition and hopes for their video which made me excited. I explained to them that the most important part of video was allowing the audience becoming apart of their world for 2 minutes.
I showed them this “graph” of the emotional ride we could take the viewers on to share their message.
It’s important that the planning for your video starts way before you show up on location. Just because you don’t know what the people you are interviewing are going to say doesn’t mean you can’t prepare.
Ask any seasoned veteran in video production and they will all say great production comes from great pre-production.
Preparing for the Interview
Before I go to the shoot I go over in my head what my intentions are for the interview. If you focus on the outcome you want you will be much more likely to achieve your desired results.
What is the intention of the interview? — Why are you interviewing this particular person? Are they going to be the main sound in your video? Do you need a specific sound byte to link a section together in your video?
Guideline Questions — I like to have some general questions written down to get the interview started. Depending on how the person is responding and how the interview is going, I will break off from the questions and follow the natural flow of the conversation. It’s a good sign if you are diverging from the questions because the interview has just turned into a natural conversation.
USE THE QUESTIONS AS A REFERENCE AS OPPOSED TO A HARD A FAST OUTLINE TO FOLLOW.
Remember, the conversation doesn’t need to be linear. You can skip over parts and go back and forth. Editing exists for a reason. As long as you follow a natural flow with the conversation you will be fine.
What is the tone of the video overall? What state of mind do you need to help the interview subject getting into? Are you going for a serious dramatic piece, a funny light tone? You are the director in the interview so you control the flow.
Before You Hit Record
When you arrive at the location take the time to scout out the area. Hopefully you were able to scout before the actual day of the shoot, but we aren’t always given that luxury. Have someone familiar with the location show you around to the different rooms and options for shooting locations.
In each room, pay attention to the acoustics, and the action going on. Here are some things I am cautious of:
Acoustics of the room — How does the room sound? Does it have a lot of echo? Is there a buzz from the air conditioning? Music playing? See how much of this you have control over. Generally you can get someone to turn off the air conditioning for a few minutes, and they can certainly turn the music off.
LOCATION SCOUTING IS CRUCIAL FOR GOOD INTERVIEWS.
If I know the location is known for being noisy I will ask will if we have control of the sound in the area, and for how long. This is important because you don’t want a change in audio during the interview. Plus you want to keep the momentum going once you get started.
Action in the room — Are other people going to be walking in and out? The more control you have in the location, the better your sound will be.
Comfort Level — Does the person have a comfortable chair to sit in? A bottle of water? These things are all important because you want to keep the interview moving at a natural pace.
Conducting the interview
The number one factor that separates an experienced video production company from amateur is how you conduct the interview. More than likely the person you are interviewing is NOT an actor. Expecting someone to give you a well spoken line from a script when they have NEVER done that in their life before is crazy. They won’t be able to recite certain lines in a natural tone. It will sound forced and contrived. Avoid having the subject read off a script at all costs. This will completely ruin your video. Remember the suspension of disbelief?
THE MOST IMPORTANT PART OF DOING AN INTERVIEW IS HAVING A CONVERSATION WITH YOUR SUBJECT.
There is a way on how to get someone to say what you want specifically. More on that later.
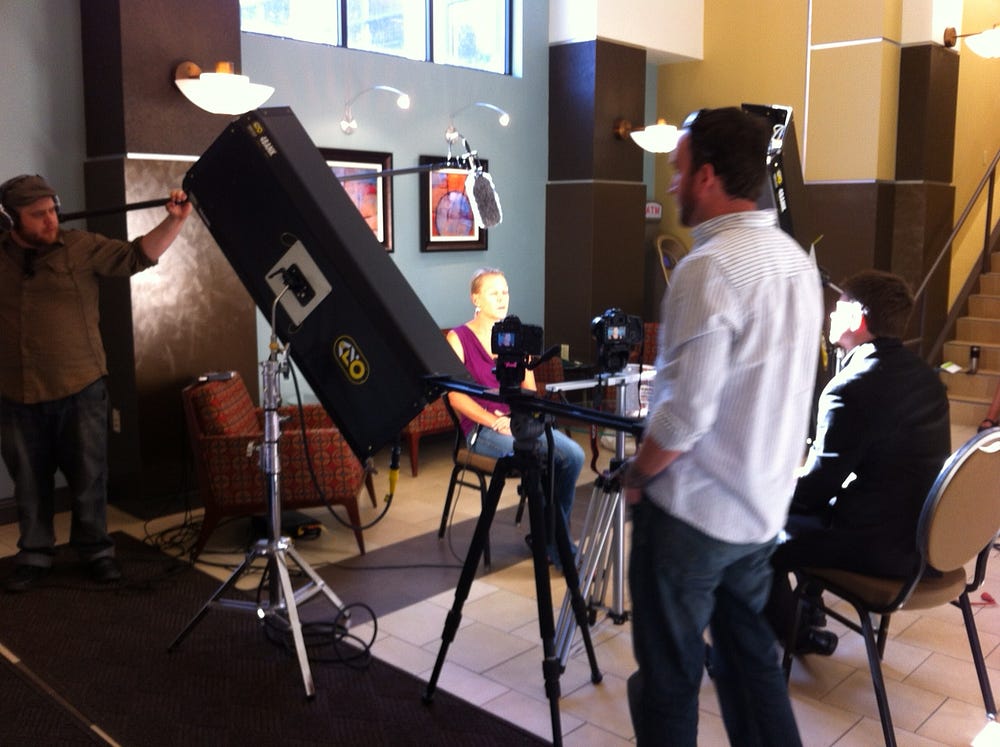
A lot of times the people you are interviewing have never been on camera before. They will most likely be nervous and not used to having bright lights shining in their face.
Take a few minutes to help them get comfortable. As your camera operator is getting set up begin talking with the interviewee in a way that would relax them. Ask them what they did this weekend, or what their favorite part about their job is. The key here is to comfort them as well as build rapport. If they drop hints at something that could trigger a certain emotional state, use that later.
Example: During the warm up if someone mentions they spent some time with the family this weekend and had a good time, see if that’s something they will talk more about. During the interview you could ask, “Earlier you mentioned you like spending time with your family. How has this impacted how your run your business?”
As the interview progresses pay attention to their body language and tone. If they aren’t connecting to the questions you are asking, try moving in a different direction.
If someone is really getting into a topic, and you feel like you are getting good sound out of them, guide them with a few questions. A lot of times you can replay what they just said to show them what part you liked, and then ask a follow up question to get another answer out of them.
Example:
Interviewee: I just really love showing up each day. I really struggled showing up each day at my previous job, the connection and community just wasn’t there.”
Me: “I hear you on that. A lot of people share that same struggle with having a job they don’t like. What has this transition between going from a job you don’t like, to one that is very fulfilling done for you?”
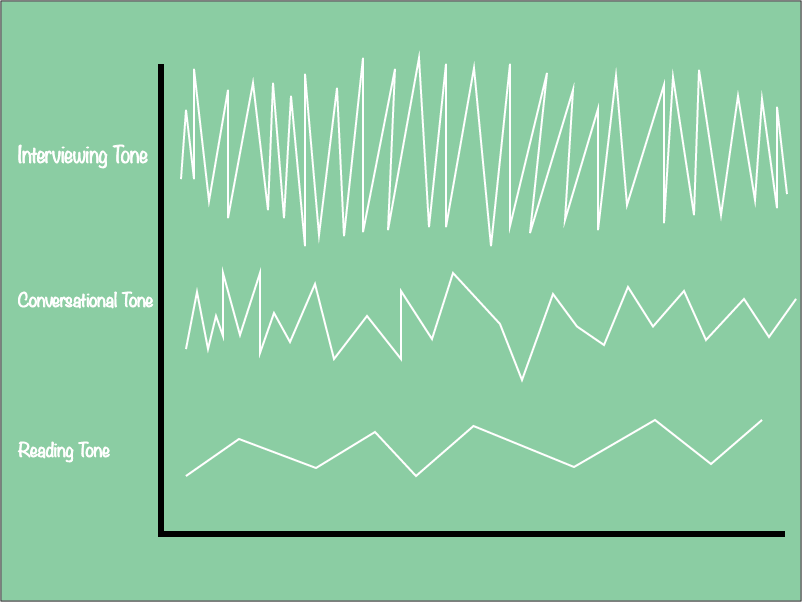
The difference in tones
There is a difference in tone between conversational tone, reading tone, and live interview tone. If you are having a conversation with the person before they know you are interviewing you will get one tone, once everyone says “camera’s rolling” their tone will shift. Usually it goes from casual to a more deliberate annunciated tone. This is natural human reaction. Most people want to perform well in high pressure situations so their concentration shifts.
MERGING DIFFERENT TONES OF VOICE IS VERY CHALLENGING AND WILL BREAK THE CONTINUITY IN YOUR EDITING.
Don’t ask your important questions first. Save those for when the interviewee has gotten comfortable.
Changes in tone throughout the interview can actually cause problems if you are trying to cut up sound bytes from the beginning and end. To fix this, you can re-ask questions at the end in a slightly different way.
Example: If the interviewee has drifted off towards the end and lost their tone I will say:
Me: At the beginning of this interview you mentioned your passion for building bikes is what drove you to start this business. After being in business for 5 years what do you think has been the biggest factor in staying successful?”
This will spark the beginning of the interview feeling where she / he was passionately talking about their love for bikes. Energy will rise again and their tone will be closer to how it was at the start.
In all reality, some people just won’t be good on camera either. Plan for this. Don’t rely on just one person to be on camera if they are too nervous to even say their name. I’ve only come across 1 or 2 people who seem like they are having a nervous breakdown, but we were still able to get at least 1 sound byte out of them.
Getting people to read off a script.
I know I have mentioned how much I am against this. However there are certain times where you can make it sound natural.
Usually deeper into the interview when the person is comfortable, they might say a really good line, but stutter over it. Quickly jump in and say, “can you say that one more time?” And the conversation tone won’t change much. The key is catching them right in the act. Immediately step in and have them restate the line. Going back later won’t work.
If you are shooting in a location where the scenery can’t be beat, but there is a loud generator running or cars driving by you might have to re-record the audio in a separate location. This is usually for shorter sound bytes where you just want them to say one or two quick sentences.
The best way to do this is by moving them to a quiet room and get them to practice the lines again a few times. The trick here is to just be running the audio while they are practicing. They will be more relaxed without knowing the audio is recording. You will hear a tone shift in their voice between a practice session and a live record session.
Becoming good at interviews takes time. Learning how to read body language and engage with people past surface level is a skill. That means everyone is capable of doing this and making great video.
Remember, good production starts with good preproduction.
I would love to know your thoughts on this post.
Leave a comment below or Tweet me @creativedoes.
- - - - - - -
(Article Source)


 Post a Comment