Search the Blog
Network With ReelCast


Films For The Family

Inspirational Web Videos

Film Festival

Blog Archives
Admin Login

Entries in Lighting (7)

8:00AM

Why choose LED?

In 2009 I studied at Nordland College of Art and Film in Northern Norway. I remember that the school had just bought four flat LED lights to make the film productions easier and more creative for us students. The school had already several powerful HMI lights and smaller tungsten lamps, but being able to light scenes in small tight spaces was a difficulty and also to light outside in the beautiful nature of Northern Norway, without having a noisy power generator running in the background. Unfortunately the LEDs back then got rarely used, due to the bad Color Rendering Index (CRI) they had. The light they produced simply looked too green. We needed to use magenta filter to compensate some of the colors that the LED produced, and even then it looked too unnatural.

Now, six years later, the CRI level of affordable LEDs has improved dramatically. Today I’m running my own production company, and LED’s are the only lights we need. It has never been more practical to light a scene like now. The crew can consist of few people, due to low weighted lamps. They are easier to operate because of their size and because they never get warm. In addition, the low price of the LED´s makes the production cost smaller. The technology has made it easier for indie film-makers to light like professionals, and that will eventually let us use more time on the content itself, and less on the equipment. I also think that some actors feel more comfortable when there are less big gear surrounding them when acting a scene. The LEDs are smaller then traditional video lights, and therefore not as “scary” as before.

Stills from the short “Castin Catharsis” using only LED lamps with hight CRI:

Stills Casting Catharsis

I have tried the Aperture Light Storm LS 1S for many different types of scenes, and I get surprised every time I see the footage. It looks clean and natural no matter what the subject is. Due to the high CRI and powerful LED diodes, this lamp is great to use as a main light for larger shots. On my Youtube channel (Andyax) I made a video where I light up a kitchen during night, looking like it’s morning with bright sunlight. Then I tried to make the same scene, with the same setup, looking like the moon was lighting up the whole kitchen. The last test I did, was to light up a part of a forest, to see if I could use it as a main lamp for a scene shot in the forest at night. It worked great! By combining the lamp with a smaller LED with the same high CRI, and a reflector, you may get everything you need to shoot your film. Press “read more” under the video I made about the lamp, to read more :)


What are the potential pitfalls or problems with LED lights in video?

Even though the CRI level of affordable LED lamps has increased, you may be unlucky and get yourself a LED that creates green and unnatural light. So before buying it’s important to be sure that the manufacturer is trustworthy, and that you figure out the CRI value of the lamp. If they don’t write anything about the CRI value in the product specifications, it will probably not produce good light. The CRI value is often what makes the difference from a cheap lamp to a more expensive one. Another weakness of some LED lamps with dimmers, is that they create flickering light when dimming the light. A tip is to look at reviews and tests of the lamp on the internet, and see if someone has noticed it before you. I mentioned that small sized film lamps like the LED´s may help the actors to feel less nervous on set, but maybe it has an opposite effect? What if the actors feel that the production looks to amateurish and that the crew don’t take them serious, because they expected bigger traditional lamps. You never know…

Do you encounter color temperature issues when shooting videos with LEDs? If so, how do you deal with them?

So far, my 5600kelvin LED’s has worked like a charm. Often I use them as main lights, and then add smaller cheap tungsten halogen lamps (3200kelvin) as practical lights for lower color temperature and color contrasts. I will experiment more with color gels to compensate the daylight that the LED produces with other types of light, like sunsets and direct sunlight.

Are there reasons to avoid variable power and variable color temp models?

It may be tempting to buy a variable color temperature LED, because then you can be as flexible as possible on set. The downside is that they often costs quite more then LEDs with one type of color temperature. To save money, you can use color gels to change color temperature instead. I even think it will look more natural to use gels to change the color temperature, then to use LEDs that produce both daylight (5600kelvin) and tungsten light (3200kelvin). Keep in mind that there is a loss of intensity when using gels, so a powerful LED is recommended when using them.

- - - - - -
(Source Article by Anders Øvergaard)

8:00AM

How to Light an Interview

Have you ever needed to do an interview in an area that made it super tough, for one reason or another?

While in a remote village of Nepal for #standwithme, we needed to interview a few girls at a rehabilitated slave center. It was a crew of two with some LED lights, limited access to power, and very little time and space. These interviews had to cut in with that of Lisa Kristine or the Harr family, interviews that we had crews of four to five on, tons of gear, HMIs to recreate a sunny day, and hours to setup.

But for these interviews it was two people with 30 minutes and lighting that looked closer to a flashlight than something you’d find on a film set.

Now of course we couldn’t make something out of nothing. These interviews wouldn’t look AS good as the ones with Lisa Kristine’s, but we did have to make sure they could cut into the same film and story. And to do that we really went back to the basics. We listened to the light and looked for what was there, how we could best use the environment, and then just broke the light down into its core components and made the most of each.

SWMInterviews

Both of these interviews were lit in a crunch in the same side of a bedroom in a remote Nepal village. They are simple but clean by following each step of the tutorial below. The window as a key, some diffusion to soften it, and then a small LED light to add some fill. But it’s the details that matter here, and that we’ll cover in the tutorial.

I can’t tell you how many times over the years we’ve seen people with huge crews and massive lights spend hours lighting an interview that could have looked stronger by just working with the window light that was there.

Sometimes, we just setup what we think we are supposed to for an interview. Or we feel bad if we don’t use our most expensive and coolest lights.

But, as with most skills, if we master the basics before moving up, we can often do much more and go much further (exactly the same scenario with people jumping into huge Steadicams before they knew the basics).

So today on the blog we have something that really goes back to the basics. How To Light An Interview. It’s a complete lesson from Story & Heart’s Academy Of Storytellers. It shows you how to get setup and get strong results right away. It also breaks it down in a way that is easy to remember and apply on every shoot.

....(Read the Full Article Here)

8:01AM

Lighting on the Fly

Keeping things simple and minimalist not only lowers the barrier to entry to making a video; it also makes our video style more accessible to a wider audience.

This minimalist philosophy has a major influence on how I choose to light videos. We've dubbed this minimal, flexible technique "Lighting on the Fly".

When I'm setting up lighting for a video at Wistia, I follow 4 terrifically simple rules:

  1. Make the shot (and the people in the shot) look pretty.
  2. Kill any and all shadows on faces.
  3. Don't intimidate the person on-camera.
  4. Use the most convenient lighting option (it's often best).

Join me on a journey through space and time as we hack lighting and turn the world of traditional "3-point lighting" upside down!

READ FULL ARTICLE

12:00PM

Your Film Needs a Good Gaffer

Watch as this woman — yes, this is just one woman — finds her features altered as the lighting shifts around her. The plans of her face move, the vibe she projects alters, and the genre of film she’s in morphs from drama to horror to comedy.
- - - - - -
(Source Article)

8:00AM

Helpful Ways to Get a Grip on Lighting 2

(Source Article) By Bobby Marko | August 22, 2014

Lighting is an evolving art form. Not only does technique change and advance but so does the technology of how light is produced and generated. Even a decade ago the landscape of production lighting was much different from what it is today. Just like with the cameras that are coming out today, the affordability of owning your own light kit is increasingly becoming more possible. The good news is that you don’t have to own much nor spend much to have a good small light kit to use for many types of productions. Gone is the day of having to have 5K and 10k HMIs and Maxi Brutes on set for many productions. Of course these are still used for high end commercials, music videos and films but more and more you are hearing of filmmakers making full feature films with just some LED and florescent light kits.

Throughout this series I've talked about technique when it comes to using your lighting setup (if you missed the others, read Part 1, Part 2 and Part 3). As I close out the series I want to talk about the lights themselves so you have a better understanding of the tools you have available to you.

Lighting Tips for Cinematographers

Part IV: Types of Lighting Tools

Here in part IV I want to address the issue of knowing what lighting to get for your production. I’ve heard many times from filmmakers that they often don’t know what to get for their productions because (and thankfully) there are many choices and with each choice requires different budgets. I think many filmmakers give up on trying to decide and just get an Arri 4-light kit and they’re done. But knowing what each light is for and putting some thought into your lighting setup will help you make some decisions and be confident in choosing your lighting package. I’m going to break down the post by What are the different types of lights and then for each light talk about How are those lights typically used and Why would you use them for your production. This will not be a comprehensive list as the post would get very long but it will give you a basic understanding of the different types for you to get started. Then, as you need, you can learn more from other resources (and there are plenty out there on the web!).

HMI

Helpful Ways for Cinematographers to Get a Grip on LightingWhat: HMI lights (Hydrargyrum medium-arc iodide… yeah, just remember HMI and you’re fine!) are a standard in film and television. HMI lamps come in all sizes usually as low as 200 watts all the way up to 24,000. They require a ballast to operate and some of the low wattage lamps can even run on Edison power (home/office plugs) but most of them require generators or high amp circuits. They are one of the most expensive genre of lights so often you will rent these for your production.

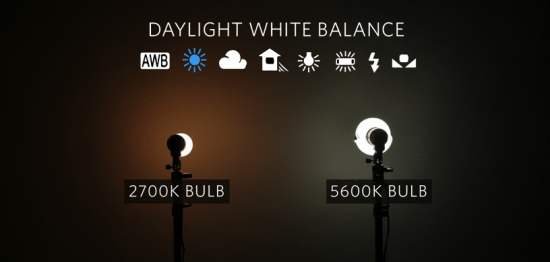
How: Typically HMI lamps are used to generate daylight or a daylight effect because of the standard 5600K-6000K rating. And because you can go up to a 24k light, they can generate huge amounts of light, 4 times the lumens per watt of electricity over tungsten lamps. Most scenes you see where moonlight or daylight beams projected in the scene are usually HMI lights being used.

Why: I personally have used HMI lights for key lights as well as set lights. They are very versatile when it comes to their use. But you definitely want to use HMI lamps when you need to light a large area of your set. Also if you want to to mimc any kind of moon or daylight, HMI lights are most often the best choice. As I mentioned in part 3 of this series though, get the most wattage you can afford and the least number of lamps. You’ll be amazed how you can use one lamp and create two different light beams with some flags and scrims.

My Favorites:
Arri Arrisun 1.2k, 4k
K5600 Joker Bug 400, 800
Mole Richardson MolePar 575

Tungsten

Helpful Ways for Cinematographers to Get a Grip on LightingWhat: Tungsten or Halogen lamps have been used since the birth of cinema because they use incandescent bulbs to generate the lumens and incandescent lighting has been around since the late 1800’s. Just like a typical light bulb in your house, tungsten lighting is a native 3200k-3800k temperature and can run on Edison power. Larger lamps requiring more wattage (typically 2k +) will require generators or larger amp circuits. Tungsten lamps come in a many forms so they are extremely diverse as well as low cost both in purchase and rentals.

How: Tungsten lighting are used in many ways. from particular lighting, to large source lighting, stage, theater, etc. Like HMI lamps, tungsten lamps can be used to light sets and large scenes. Although not as powerful a light with the same wattage as the HMI there are some benefits for using tungsten lamps. They are favored when shooting at high frame rates versus HMI because HMI lamps typically give off a flicker effect when you slow over-cranked footage down to 23.98 or 29.97fps. Also, some filmmakers like the look of tungsten over other lights because of the flesh tones they get from incandescent bulbs

Why: Although I’ve moved away from tungsten as my main source for lighting I still use them. I will often use them for particular lighting, back or hair lights and effect lighting. Even though modern HMI lights have flicker-free ballasts, I’ve read that depending on what speed you over-crank your footage will depend on how effective that setting will be when using HMI lights. So even today, most filmmakers will use tungsten when shooting at higher frame rates, usually above 300fps.

My Favorites:
Arri 4-light kit (150w, 300w, 650w, 1k, should always have one kit on set!)
Mole Richardson Maxi Brute 9 lamp
Dedolight 150w w/dimmer

Florescent

Helpful Ways for Cinematographers to Get a Grip on LightingWhat: Florescent lamps uses bulbs that are mercury-vapor filled and is illuminated when an electrical charge is omitted causing the vapor to glow inside the bulb housing. You often see them in office buildings and in modern times being used in the home. For film and video production they are used to give off a soft light and generate relatively very low heat and consume very low amounts of electricity. For this reason they are very desirable for production. Fluorescents are somewhat inexpensive to own and very affordable to rent.

How: Filmmakers typically use florescent lighting to illuminate their sets in different ways. Many times to replicate a real work setting such as office and industrial sets. But they are also used on medium to close shots to light their subject without generating a large amount of heat as well as to get into small areas such as automobiles and confined spaces. The drawbacks to florescent lights is they do not generate a large amount of light nor can throw light very far so they are often not used to light large sets or exterior lighting.

Why: I love using fluorescents for key lights on subjects when I’m shooting interviews or need to get into a tight areas. With digital cameras now able to shoot at a high ISO without much grain or noise the low amount of lumens sometimes is not a factor. Also, fluorescents give off a nice soft light so having to use diffusers becomes less of an importance. Florescent lamps often come with dimmers so they are very flexible when used as a fill light and you can obtain different temperature rated bulbs so you can match daylight or tungsten should you be using fluorescents with existing lights already in your lighting package. You can also throw some colored gels over the fixture and create some nice glow effects for your set.

My Favorites:
Anything Kino, not the cheapest but they are the best imo!

LED

Helpful Ways for Cinematographers to Get a Grip on LightingWhat: LED lighting has come onto the scene with a vengeance. Above all the other types of lighting I’m mentioning, LED is advancing at a higher rate than any other. LED (Light-Emitting Diode) originally was used for infrared lighting but in the 1960’s began being used for visible light in electronics and small devices. Today they are now being used in film and tv in many ways, even as source lighting. LED lamps, like tungsten and florescent lights can be dimmed but they go one step further. Some LED lights can also change color temperature with simple adjustment. This creates a wider range of use for LED lighting in film and video. Many rental houses are just now warming up to LED lighting so you may not find a huge selection but like fluorescents they affordable to own and rent. With the added flexibility of use over other types of lights, the added cost makes them worth the investment.

How: Many productions today are using LEDs in a variety of ways, source lighting, fill lighting, set lighting, green screen or chroma key capture, special effects lighting and live event. From broadcast or wedding cinematography, you will see LED’s everywhere. Also, all types of productions, music videos, short and feature films, documentaries, promotional videos. LED’s are one of the most versatile lights in the industry. However, LED still cannot throw lighting no produce high amounts of lumens so you will not often see them lighting exteriors or large sets… at least for now.

Why: There was a time I swore off LED because you cannot cut or shape the beam throw. The panel style lamps deter you from attempting this so this limited my uses in my productions. But as of the last few years manufacturers are beginning to change the way you can use LED and slowly but surely I’m using more and more of them in my productions. Though still not powerful enough for long throw lighting or exterior lighting LEDs are great for lighting subjects, backgrounds, confined areas such as small rooms and automobiles and particular lighting. The more modern lamps have gotten better at diffusion so they becoming a softer light, matching the aesthetics of florescent bulbs.

My Favorites:
Socanland NOVA CTD 1x1
Arri L7-C
LitePanel MiniPlus Brick

I hope you have found this post, as well as all the other posts pertaining to lighting useful. I've enjoyed creating and writing this series and hopefully it has given you enough information and tools to get you thinking about lighting for your future productions.
- - - - - - -
(Source Article)


8:00AM

Production Design

(This is an excerpt from The Music Bed Blog.)

If you’ve seen anything Khalid Mohtaseb has ever done, you know that his work is consistently, mind-blowingly beautiful. The guy is practically a legend. So we were surprised to hear that his secret isn’t some obscure lighting technique or a particular piece of equipment, but rather a person — Joseph Sciacca to be specific: a production designer.

After he started working with Joseph, Khalid hardly needed to light anything at all. Because Joseph was creating such beautiful environments, Khalid just had to point the camera and start shooting. The secret, it turned out, was creating something beautiful to shoot in the first place.

Khalid and Joseph have collaborated on projects for clients like National Geographic, Everlast, and Toyota — just to name a few. But even after all these years and high-profile projects, both of them insist they are still just learning. “Every job is homework for the next job,” Joseph told us. “Life is homework.”

Check out what Khalid and Joseph have to say about production design, lighting, and how $20 of tar paper can change everything.

KM: One of the first things a cinematographer should ask themselves when they walk into a space is, “How do I create contrast?”

 I learned this four or five years ago when I sat in on an interview with Jack Green, an AFC DP who’s shot for Clint Eastwood. I asked him what the most useful advice he’d ever gotten about cinematography was. He said that when you first walk into a space, the first question you have to ask yourself is, “How do I create black?”

I didn’t totally understand what he meant [at the time], but he was essentially talking about contrast. How do you create contrast? It’s the concept of negative fill: putting black into spaces. So if you’re shooting in an all-white room, find the edges of your frame and put black there so light doesn’t bounce everywhere. What a lot of beginning cinematographers don’t realize is that light is bouncing everywhere all the time, and you don’t realize it until you start trying to create black.

For this Everlast scene, we were in this all-white room, and there was no way to create black.

JS: The quickest solution for finding black in that location was to black out the floor so we didn’t have all that light bouncing off the tile. I drove to Home Depot and grabbed some roofing material. It’s like tar paper. It’s got this fantastic non-reflective surface and it’s relatively seamless. That’s where having experience with hands-on work — masonry, carpentry, things like that — really pays off for a production designer. You need to know what tools you have out there.

KM: We put this stuff on the ground, and when we looked at the scene again, it was the most drastic difference ever. We weren’t getting any bounce off the floor. It created this moodier look, and the actor’s face was almost silhouetted. The lighting was coming from one side but didn’t bounce; there was no fill whatsoever. And that was it. That’s what we ended up going with. We just put a small light through a window, which created a really interesting look. I think the whole fix cost us $20.

(Read More)

8:00AM

Helpful Ways to Get a Grip on Lighting

By Bobby Marko | July 31, 2014
(Article Source)

I spent the 1st half of this year releasing two films, a feature length documentary and a short film narrative (Becoming Fools and Fruitcake respectively). Through this process I've attended screenings and festivals of our own films and for others. I've also sat through several Q&A's with independent filmmakers and although I love hearing how other creatives move through the process of producing their work I sometimes get increasingly frustrated with the fact that camera gear takes such a center stage while lighting, composition, sound design and production design take a distant back seat.

As important as camera and lens choice is for your production lighting, audio and composition are equally as important. I've seen quite a few films shot on RED, Alexa and high end Canon and Sony cameras that looked awful. They should have saved the money they spent on those high end cameras and lenses and invested in lighting and shot on a dslr, it would have at least looked better.

Many times in the moment of my irritation I thought about firing off a social media post to make a quick statement. But I thought it best served to compile my thoughts and turn these points into teachable moments. I'll try not to make these posts long, there will be a few of them. But I want to make these tips easily digestible and things you can put into practice immediately.

Lighting Tips for Cinematographers

Part I: Foreground and Background Exposure

A common mistake I see with independent and young Filmmakers is not knowing how to light their scenes for foreground and background. Often they rely on setting a low aperture from their lens to create depth. However, properly setting your exposure for your foreground (or subject) and background will create the same affect and give you more options with your camera.

The general rule of thumb is to set your key light one step higher than your background. Of course there are some variations to this rule depending on style and genre. But I want to burn that rule into your brain, my subject must be lit one stop higher than my background. Say that to yourself until it's the first thing that comes to mind when your gaffer asks you "how do you want to light this?"

Now, how do you do this? Very simple, get yourself a light meter (I don't care if your gaffer has one already, every cinematographer should have one in his or her dity bag). Even if you have an app such as Cine Meter, it's still a tool to aid you. Which ever you have, learn to use it (I'm not going to go into depth on how to use a light meter, there are plenty of YouTube and blog posts covering that subject) and then once you have a simple lighting rig set up meter your subject. Let's say for example you get a reading at 4.0. Remember that and then move to your background. Find a flat area that faces your camera lens and meter that area. You should get a reading of 2.8. If not then adjust your lighting respective to your reading. If the background reads 3.2 then your a half stop too high. Consider a half scrim or pull your lighting back (or dim a half step if you have that ability). If you're reading is 1.4 for the background then you must increase the power. Sometimes you have to adjust your key light in order to get the proper setting but no matter which method you have to employ, once you have this set, you will have a proper foundation to start with lighting your scene. Now, let's look at some examples.  


Shawshank Redemption (1994) Roger Deakins - DP

Here is a clear example. We have the subject that is not too far from the bookcase behind him in the background but notice how Roger Deakins (DP) lights the subject at least one stop above the background. Had he lit the background as much as the subject, even keeping the same depth of field, the image would have been flat and the focus for the audience would not have remained on the subject. 

Helpful Ways for Cinematographers to Get a Grip on Lighting
We Are What We Are (2013) Ryan Samul - DP

Here's another example where Ryan Samul uses the same principle. His subject is lit at least 1 stop above the background, even though the texture is great, it's not the focus of the scene so he chooses to keep the background dimly lit. Now, as I mentioned before employing this method is a start. Sometimes you want your background to play a role in the scene as it conveys an importance in relationship to the foreground and.or subject. So let's look at some examples as to when this rule can be broken.

Helpful Ways for Cinematographers to Get a Grip on Lighting
The Big Lebowski (1998) Roger Deakins - DP

Here you see the background of the grocery store obviously lit much higher than the subject. And if you also notice the angle in which Deakins uses the store shelves, starting in the foreground and moving towards the background. This is to show the deep philosophical nature of  "the Dude" in the opening scene. It's also to establish the environment in where he is. No one is around, he is isolated. You can assume that it's the middle of the night when most people are not at grocery stores. So there's a ton of information you can gather from this one shot and a reason why sometimes you want to break the one stop rule when lighting foreground and backgrounds. But at least you can see the lighting is not even so there is still depth to the scene.

Helpful Ways for Cinematographers to Get a Grip on Lighting
Book of Eli (2010) Don Burgess - DP

Now here is a shot in which Don Burgess decides to blend the characters in with the background. Both the subjects and background are nearly in focus and lit almost the same. Why? Many times you want to submerse the viewer into the world in which your characters are living and here is a good example of that. This method of even lighting allows the audience to get a sense of the environment in which the characters are currently in. But notice there is still a lot of light and dark, between the object, even on the characters who are lit from only one direction. Burgess still employed depth but just from a side to side and not in Z space.

Like with most anything creative, there are rules to break and the "one stop" rule with lighting is certainly no different. But learn it first and then use the creative process to know when and how to break it.
- - - - - -
(Article Source)