Search the Blog
Network With ReelCast


Films For The Family

Inspirational Web Videos

Film Festival

Blog Archives
Admin Login

Entries in Editing Tips & Tricks (30)

8:00AM

Learning the Basics - Pt. 3

Several years ago Digital Juice produced several training series for the web called DJTV. It covered topics ranging from Audio, Tech Info, and Filmmaking Basics. One of the shows I enjoyed the most was "Cutting Class" by Chris Gates.

Cutting Class

More often than not, the edits in your sequences need to seamlessly flow, and not distract from the big picture. In this episode, Chris "Ace" Gates, looks at the decision making process and covers some basic training for camouflaging your cuts.

Topics range from Color Correction, Scene Transitions, ADR, Blending Modes,Tips for Text, Green Screen, and more! Chris "Ace" Gates shares some simple but effective editing tips and techniques for utilizing mattes and masks to build multi-layered composites.

Here is a link to watch all the Cutting Class videos, be sure to start with the first video on page 1, for some reason it has all the episodes listed with the last one first.

WATCH CUTTING CLASS

8:00AM

Learning the Basics - Pt. 2

Several years ago Digital Juice produced several training series for the web called DJTV. It covered topics ranging from Audio, Tech Info, and Filmmaking Basics. One of my favorite "shows" was Field of View, where they covered what I call "Film Theory." In FOV the main focus (no pun intended) was to discuss how to communicate your message to the right audience.

Field of View

Chuck Peters reflects on what makes a pro a pro and challenges producers to shift the focus of their minds to think less like technicians and more like artists and to invest in their talent, not just their equipment. 

Most of the emotion in your videos is generated with music and images. It's nonverbal. You can take your edits to a higher level of professionalism by letting your shots do the talking.

Here is a link to watch all the FOV videos, be sure to start with the first video on page 1, for some reason it has all the episodes listed with the last one first.

WATCH FIELD OF VIEW

8:00AM

Learning the Basics - Pt. 1

"Vimeo Video School is a fun place for anyone to learn how to make better videos. Start by browsing our Vimeo Lessons, or find specific video tutorials created by other members."

If you are new to video and need a beginners course in the basics of picking a camera, shooting, and editing, this a video series for you.

Their are also a couple videos that cover the basics of editing with iMovie and Windows Movie Maker.


When it comes to the DSLR series they cover topics such as setting up your DSLR, lenses, timelapse, recording sound, and lots lots more!


Get started at the Vimeo Video School HERE!

3:52PM

Film Editing 101: Eye-Blinks

"We’ve been going through my notes from my Editing 1 class that I took in Film School from Professor Gerstein.  Today, I’ll share an extremely practical tip about eye-blinks.

When someone’s eye blinks, the window to his soul is closed.  It distances you from the person.  Avoid closed eyes and lazy eyes on the cut.  It has a subconscious effect on the viewer.  Cutting on an eye blink is not wrong but it must only be used intentionally and carefully.

I make it a habit to go back through my edit when I’m finished with a scene and skip from cut to cut checking the actors’ eyes for blinks.

About a month ago, I went to see Scorsese’s Shutter Island.  This movie is full of “bad” cuts.  But they are in there on purpose.  If you’ve seen the movie, you know why.  The plot/story drove all the decisions – including the edits.  Like the movie or not, that’s pretty cool.  You gotta love Scorsese.  I’m looking forward to seeing the film again when it comes out on DVD so I can look at the cuts more closely – including the eye blinks." ~ by Jeremiah

- - - - -
Source Article

6:54PM

FILM PIPELINE - Part 3

Post Production

"At last, we get to the end of the film pipeline.  Postproduction is everything that comes after shooting has finished."

Topics:
-
Acquisition
-
Visual Effects and Effects Editing
-
Editing, Sound (Editing, Design, Foley, Dialog Editing and A.D.R.) and Music (Scoring)
- Job Descriptions for Post-Prod Jobs
-
Sound Mix
-
Color Grading / Timing and “D.I.“
-
Print It!
- - - - -
By Stephan Vladimir Bugaj

- All the "Film Pipeline" links can now be found in the Basics drop-down menu in the header bar.

9:00AM

The Art of Editing - "Crossing the Line"

Crossing the line is a term for mis-matched screen direction. Christine & Steve discuss and show examples of when and why an editor would purposely "cross the line." Why would you want to cross the line? How can you plan ahead of time to allow or avoid crossing the line? What editing techniques can be used to "fix it in post?"

To learn more tips, check out the MacBreak Studio Podcast on iTunes!

2:20PM

Christian Film Makers Workshop - Bryan, TX

This past weekend I had the opportunity to help teach at a film making workshop in Bryan, TX!

The Jones family who hosted the conference has been working on a 25 min. (approx) short film called Bessie about the story behind "When the Roll is Called Up Yonder" - they used a lot of examples of location scouts, costumes, lighting and story boarding from their experience. I have to tell you, I am very impressed with the amount of work they are putting into this movie and I'm looking forward to seeing the final product! Visit their website to watch a trailer for the movie.

The goal of the training workshop was to encourage Christian young people who are interested in film making by providing a two day training course covering the basics of film making and then providing an incentive for them to actually make a film by hosting a film festival at the end of the summer with a $100 Grand Prize!

I got to teach about editing and color correction, and had an absolute BLAST!!

Quick review of my presentation


Stacie and I were the main presenters


"These are the basics of an editing program"


Me having fun :)


Doing some live editing for the group


My bro Caleb, me, Kayleen and Sarah (from DCFM) and Stacie Jones
I had a lot of fun working with this group!


You can see more pictures from trip on the ReelCast Facebook page

!


9:35AM

Editing Transitions


DJTV has a new "Cutting Class" episode up today. Watch it here.

8:22PM

Camping BTS #6

CLEANING UP THE EDIT FLOOR

Here are a couple of things that I do when I am finished with a project. First off, is to go catch up on sleep! Ok, seriously…

I put the finished video on a MiniDV tape and label it MASTER for use later if I ever loose my finished video. Cleaning up the scattered files is another way to make sure the project stays altogether (and of course that starts during production) some people even burn these project files to a CD for use later. Also, I go to the Final Cut Pro program files and delete the Video and Audio Render files for the project along with the Capture Scratch video files – AFTER I make a master first. ☺

I then get ready for the next project…..

Random Notes:
-Be careful when handling a camera around sprinklers
-Throwing leaves on the fire are a great way to make the fire brighter
-It is difficult to resist the urge of blowing out an ignited marshmallow
-Grandma is hilarious
-Camp food is really good (most of the time) and it is a good thing too, cause we like to eat ;)
-siblings don’t like paddling with their hands

That’s it for this project! I hope you enjoyed it. Feel free to let me know if you have other questions or if you have other areas that you would like me to cover in future BTS sessions.

9:30PM

Camping BTS #4

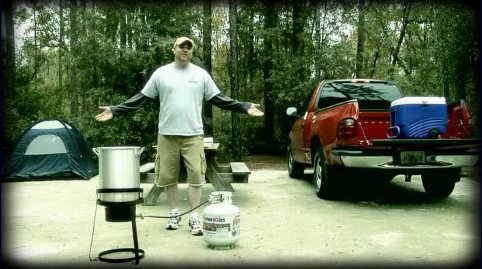
If you haven't seen the "Camping 2007" video yet....you might want to watch it first.

EDITING

CAPTURING
The first step to editing is to get the video on the hard drive. Instead of capturing a whole tape at a time Final Cut Pro allows you to go through a tape and make “in and out points” which are then created into a “temp clip” to be captured/digitized later.

I like to give my clips names that contain project and "take info. For example “Cmp07 – 01” – “Cmp07 – 02” it just helps me keep it organized. When I am done logging all the clips, I can select them and choose “Batch Capture” and the computer automatically goes back through the tape and creates the clips for me.

ORGANIZING
When editing I prefer the “View as List” option for my folders and bins. On every project I basically have 4 main folders – VIDEO – FILES – MUSIC – AUDIO. (sometimes I have Sound FX or Power Point folders too) You can see a picture of my Camping Folders below (click to view it larger).


Also, for just basic project files I create a folder on my external Hard drive for each project. Inside that folder my files are organized very similar to my FC folders. This project is a little less organized than normal due to the smallness of the project and lack of files.

Projects such as Joel’s Journey and Call of Courage have a very large number of folders.


DRAG AND DROP
Next, I go through the clips and pick the ones I like (I kind of did that when I captured the footage, but I still have multiple takes to choose from) I drag the ones I like into the timeline and arrange them by group “B-Roll” – “Narration.” Sometimes, depending on how much video I have to work with, I will even create a separate sequence just for the B-Roll. It simplifies my main timeline and keeps it less cluttered.

SWAP IT AROUND
This is the part that is really hard to describe…. For the camping project, the next step was to start putting the B-Roll that went with each point together and interspersing the narration in a chronological format. In the following picture you can see the whole FC screen. In the Timeline I have my "faded black border" on the top layer, some special FX and b-roll in the next layers, and the bottom layer is my main narration and main b-roll.


FASTER, FASTER
The bane of videographers is that the video is too long or the shots are too long. (Now I am NOT advocating MTV style editing – got it?) It is best to get into the shot late and then leave early, especially for comedy. This is a good technique for movie outtakes too I tried to cut the shots rather quickly and to keep the pace moving. Some people have still told me that the video is too long in general, and yea…there are a few places that adding some more dialogue would have helped. We live and learn right? ;)

ADJUST THE CUT
Normally I stick to straight cuts and fades, the amateur star wipe or paper airplane are not in my typical set of transitions. :P However, different styles call for different transitions and I wanted the transitions to compliment the comedy effect I was going for. “Swish transitions” are often used in movie trailers for comedic impact, so I decided to try applying it to my short video. One thing to remember when applying Special Transitions (this applies to any transition really) is that you must use it sparingly and for a reason, meaning that if you place it correctly then the audience will expect it and associate with a specific element of your video. EXAMPLE: Camping ’07 – the “swish transition to the right” meant NEXT POINT and “swish transition down” meant THIS IS AN EXAMPLE OF THE POINT JUST GIVEN. I added a few other fun and funky transitions to try and keep the pace moving. Note: SoundFX for the "swoosh" were from Digital Juice's SoundFX Volume 1.

SPIN YOUR WHEELS
After I have my video edit finished I take my color wheels for a spin! There is a lot of thought that goes into correcting the color on a shot and there is a lot of information out there on how to do it. One training video I found useful was by Digital Juice. You can view it here. (also, more on CC and special FX coming later)

MAKE THE MOVIE
Once the video is done, and the audio has been adjusted, I export the clip as a QuickTime Movie.


Some projects are now ready to be compressed using Compressor, such as Camping ’07 outtakes, while for other videos I still need to create some special titles and graphics. Camping 2007 called for some specialized titles, and since I don’t like Final Cut's title feature, I fired up Motion…but I am getting a little ahead of myself, that’s a subject is for next time….

[GRAPHICS AND TITLES] coming next….

Page 1 2 3