Search the Blog
Network With ReelCast


Films For The Family

Inspirational Web Videos

Film Festival

Blog Archives
Admin Login

Entries in Filmmaking Tips (35)

8:00AM

The Three Most Common Mistakes Of Amateur Colorists

Many filmmakers are now attempting to color grade their own work. Here’s why some are coming up short, both technically and creatively.

It wasn’t that long ago that color correction was an extremely costly process that was reserved for high-end productions working with large post facilities. As time went on and the overall cost of software decreased, more and more filmmakers started to take the color process into their own hands — and I can’t blame them. After all, DaVinci Resolve can be had for free (one version, at least), SpeedGrade comes bundled with your Adobe subscription, and there are so many other options out there too — so why not color your own work?

While it makes a lot of sense financially, even creatively, for filmmakers to attempt to color their own work under certain circumstances, there’s still quite a big learning curve involved. If you’re an amateur colorist attempting to brush up your skills, here are a few of the most common pitfalls you need to avoid.

1. The Wrong Order of Operations

The Three Most Common Mistakes Made By Amateur Colorists: Wrong Workflow
Image from Blackmagic

This is probably the number one mistake made by amateur colorists. It’s extremely common for filmmakers without coloring experience to attempt a “look” or grade without first balancing their image. This is breaking the rules of color correction 101.

The absolute first thing you need to do when color grading any piece is to balance all of your shots (contrast, levels, white balance, etc.) so you have a clean slate to work from. Only once your shots are balanced can you go in and set your creative look. If you avoid this step, you’ll never get your shots to match and the look of your finished piece will be very inconsistent.

2. Overdoing Looks

The Three Most Common Mistakes Made By Amateur Colorists: Overdoing Looks
An example of extreme color grading. Image from IMDb

Seasoned colorists understand the art of subtlety. They know how to make an image feel warm and inviting without having the audience notice it overtly. Knowing where to draw the line plays a big part in their craft.

Most amateur colorists will push their looks either way too far or not far enough, failing to find that ‘sweet spot’. There’s a time and a place for more extreme looks on both sides of the spectrum… but in 90% of cases, the best result will be found by keeping the look somewhat natural and organic, while still leaving enough room for style.

3. Using Presets

The Three Most Common Mistakes Made By Amateur Colorists: Using Pre-sets
Image from Blackmagic

Arguably, the biggest giveaway of an amateur colorist is their overuse of presets or filters. Many filmmakers will start their “color sessions” by clicking around on pre-created looks within the software they’re using, and wind up with a very poor-looking final product.

Personally speaking, I never use any presets for my work, though I’ll occasionally use them to spark creative ideas. This is typically the best way to use presets. You can quickly see what type of looks might work well for your footage (saturated, bleach bypass, black and white, etc.) and then start from scratch to build a custom look that’s tailored to your specific shot.

- - - - -
by
(Article Source)

8:00AM

MINDCASTLE’s Obsessive Scouting Methods

What’s that thing real estate agents always say? Location, location, location? Well, the same could be said about film. Knowing how to find great locations is an essential element of filmmaking — and it is equal parts vigilance, thoroughness, organization, and plain old luck. In our last conversation with Casey and Danielle of MINDCASTLE, they talked briefly about their, shall we say, exhaustive scouting methods. So we thought we’d call them up again and dig into their process.

If these two seem obsessive about scouting (they put two weeks and 1,200 miles into scouting their film The Journey), that’s because scouting has made such a difference in their work. “All of the projects I want to change afterwards are the ones where we were forced into a location, or we were rushed into something and didn’t have time to properly plan,” Danielle told us. “When you have time to properly plan, I think those are the projects you’re going to be most satisfied with.” Here are Danielle and Casey telling us everything they’ve learned about the art of the scout.


Danielle Krieger: Let’s start by talking about The Journey, which was probably the most complex scouting we’ve ever done. Sometimes a client will give you the location, and you have to pick the best spot within it. But on The Journey, we got to start from zero and go wherever we wanted.

Casey Warren: Our pitch was all outdoor activities. We wanted a plane, we wanted kayaking, we wanted hiking, we wanted a motorcycle, we wanted a ferry.

Musicbed: You had all of these hypothetical locations in mind. What was your first step to start scouting?

CW: The first thing we do is look through our own library of locations. Whenever we have free time, we go driving and look around. We take photos of awesome spots we find. So step one is looking through places we’ve already been. Step two is Google Earth. Or, actually, a really handy way to scout is on Instagram. You can type in different locations and see what they looked like today or yesterday.

DK: You can see if it’s snowy or muddy.

CW: Google Earth doesn’t always help you because the images could have been taken three years ago. Instagram is usually right now. I use it to help with some of the more remote locations, just to see what the conditions are like. So for The Journey, scouting started with our own library and computers, but then we purposefully went out to see places for ourselves. We probably drove something like 1,200 miles. It took about two weeks. Every morning we’d wake up and say, “Hey, let’s go to this island or take that ferry.” We tried to travel and explore as much as we could.

We make sure to go to the location at the time of day when we’re planning on shooting. It’s important to know where the light is going to be.

I know a lot of these locations are places you’ve been to in your normal lives. Do they look different when you’re there to scout?

DK: Definitely. For instance, we take ferries all the time. We live five minutes from a ferry launch. But when we were looking for a ferry to shoot, we rode every single one; and we realized they are all different. There are some from the ’70s, which look really cool, and some new ones don’t look as cool. That’s the first thing you’re scouting for: creative elements. How will this location help tell the story? But you’re also scouting for technical elements. Where is parking? Do I have to pay for parking? How easily can I get there? Is it close to power? Are there bathrooms close by? Those are the things you don’t really think about in your normal life.

CW: The ferry was one of the hardest scouts because we wanted to end up somewhere that had a good road we could drive a motorcycle on. We went on all the ferries to see where they ended up, and there was nothing. Just cities and towns. But we kept driving around, and we finally found this back road that happened to lead to a dock. So we got a bonus. But finding that involved three or four days of scouting where we didn’t end up with anything at the end of the day.

DK: Also, some locations look beautiful in person, but when you shoot them they come out much differently. When we scout, we always take pictures in every direction. We also make sure to go to the location at the time of day when we’re planning on shooting. It’s important to know where the light is going to be. It’s important to know what might change throughout the day. For instance, the dock in the film. We scouted that in the evening and the water was low. We thought, Oh, we’ll go down below the dock and shoot some stuff. But we ended up shooting the dock in the morning, and the water was high. So we had to change our plans. Those are the types of things you need to think about. Tide reports. Fog. If you’re using a drone, you need to think about power lines.

CW: I’ve gotten pretty good at knowing the things I need to be looking for when we’re scouting. There are basically four things: (1) Where are we going to shoot? (2) Who do we need to get in touch with for permits and permission? (3) What info do we need to get this location on our insurance? And (4) Where is the crew going to park and be? If you don’t have a specified place for the crew, you’ll inevitably want to film where everyone has decided to hang out. You always need to keep 180 degrees clear because you might end up shooting the opposite way.

Do you always get permission for the places you’re shooting?

CW: We pretty much make sure we have permission for every spot. It can depend on the size of your crew, though. If you’re two to three people — I’ve talked to the permits office about this a couple times — they’re like, “Yeah, if it’s two to three people, don’t worry about it.” But if you have more than that or if you have extensive gear, then you definitely want to get permission. We have an entire booklet full of forms and contracts just for The Journey locations alone. The biggest amount of paperwork for that entire project was about the locations.

DK: I used to think getting permits was this big, scary process and people were going to say no. But it’s really no big deal.

That’s what we try to do with any location: get people excited and involved.

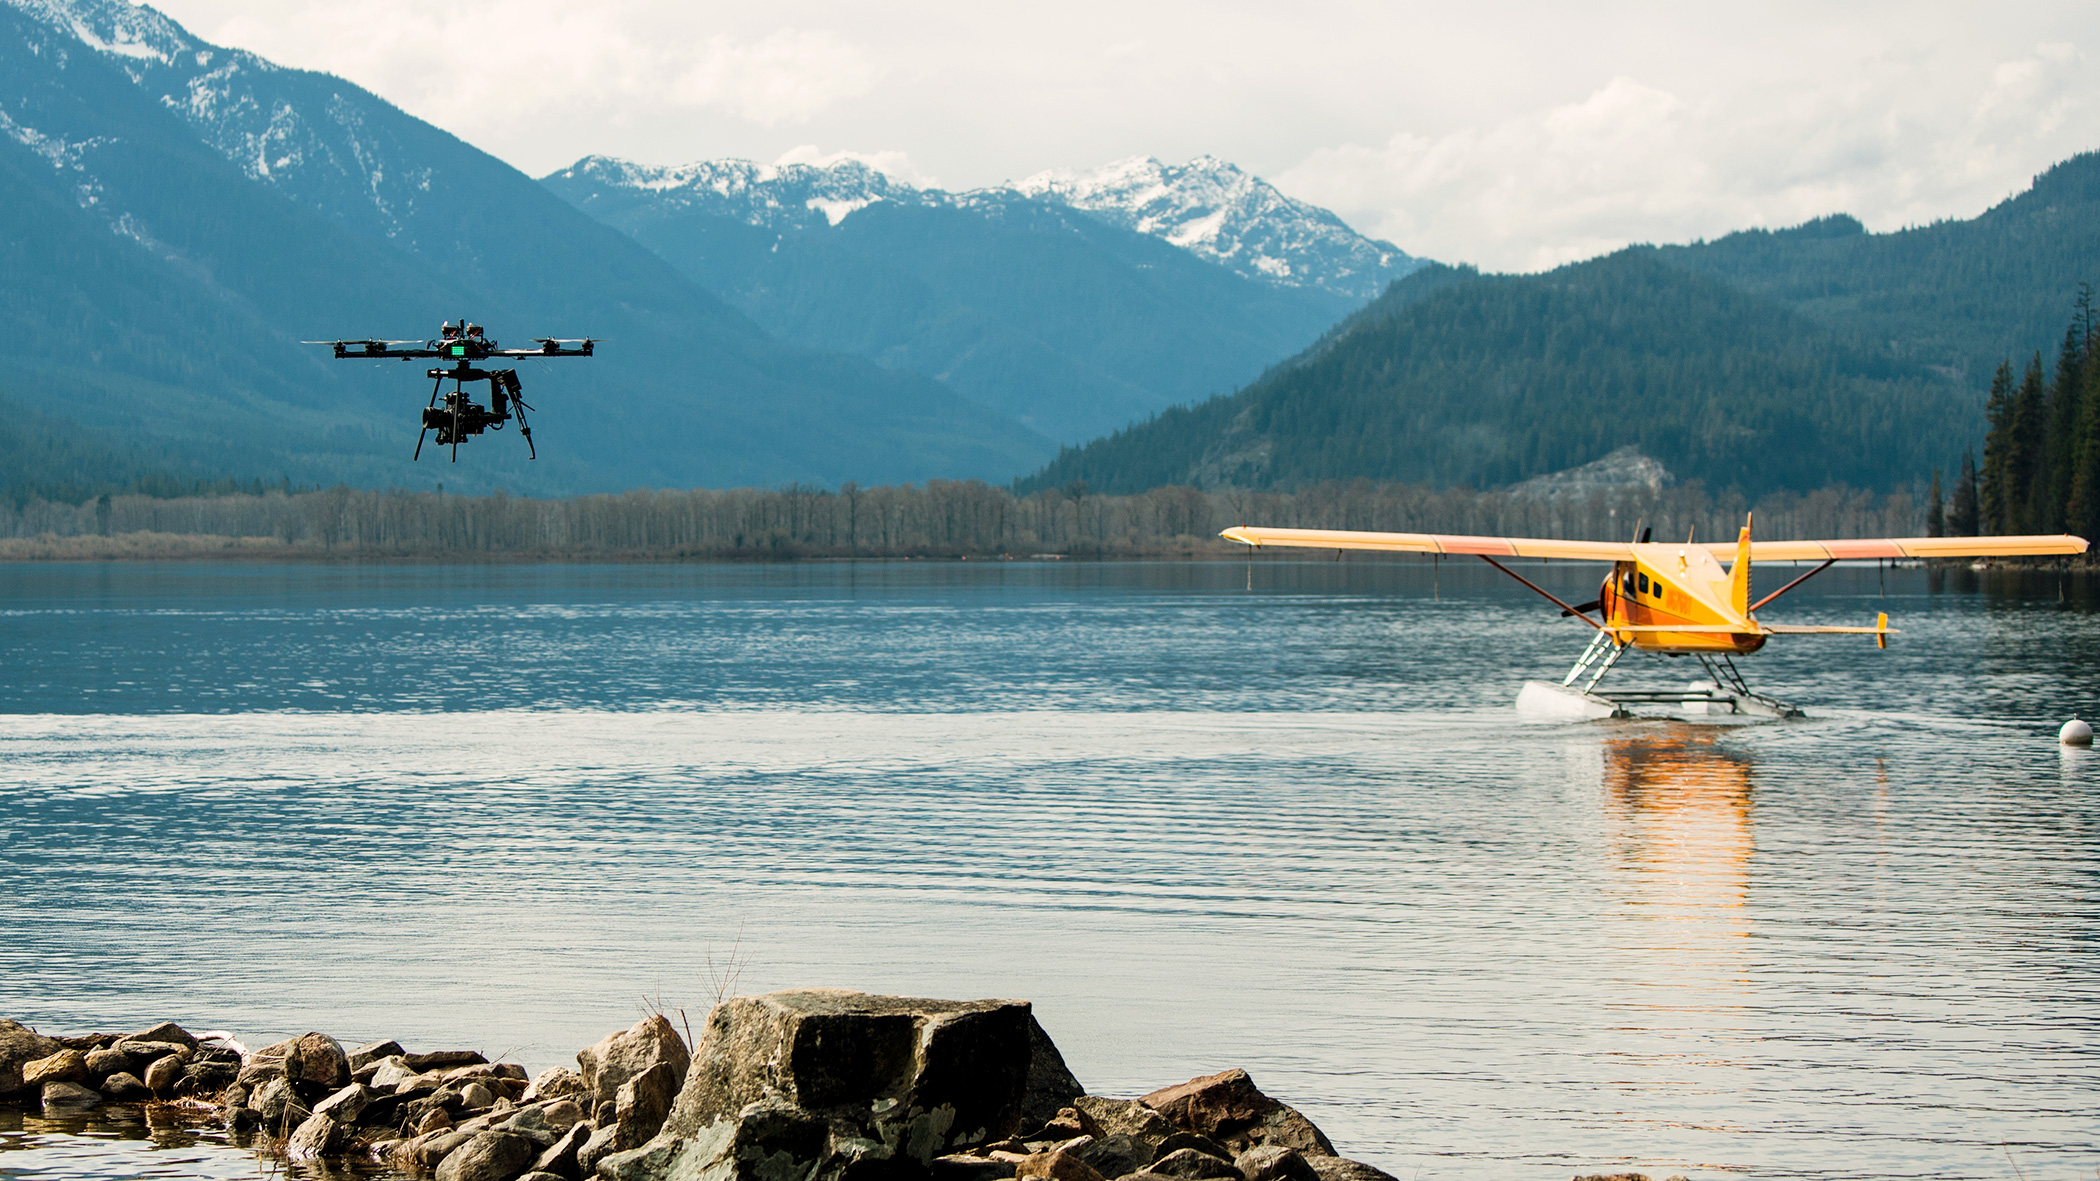
CW: One of the most important things is not just getting permission, but also building relationships. Don’t call someone up and say, “Hey, how much would it cost to shoot on your land?” Build a relationship with them. Explain your project. Get them involved and excited about it. For the seaplane scene in The Journey, we literally went around knocking on doors at this lake, which led to us meeting the family who founded the first homestead on Lake Wenatchee. I hung out with them for about 40 minutes, and they had this whole homestead area up on the mountain where we could land a helicopter. Plus, they owned all the beaches except the State Park beaches. And then it turned out their son was in film school, so we got this awesome PA who brought us coffee every morning. That’s what we try to do with any location: get people excited and involved.

Do you have to pay for permits?

DK: Yeah. They’re usually somewhere between $25 and $150.

CW: For State Parks, you have to go through a certain film permits office, and that usually takes a while. Using private property is easier because you can just get in touch with the person who owns the land. Like that family I met on Lake Wenatchee. They were like, “Yeah, cool. You can shoot here.” And that’s literally all you need.

DK: But because I’m a nervous person, we decided to rent their cabin so at least we were giving them money and they couldn’t back out. They were totally awesome and wouldn’t have backed out, but it helps lock things down when there is some kind of transaction involved.

For a scene like the boathouse, what’s the etiquette there? You had this real boat maker working in his own shop — do you pay him?

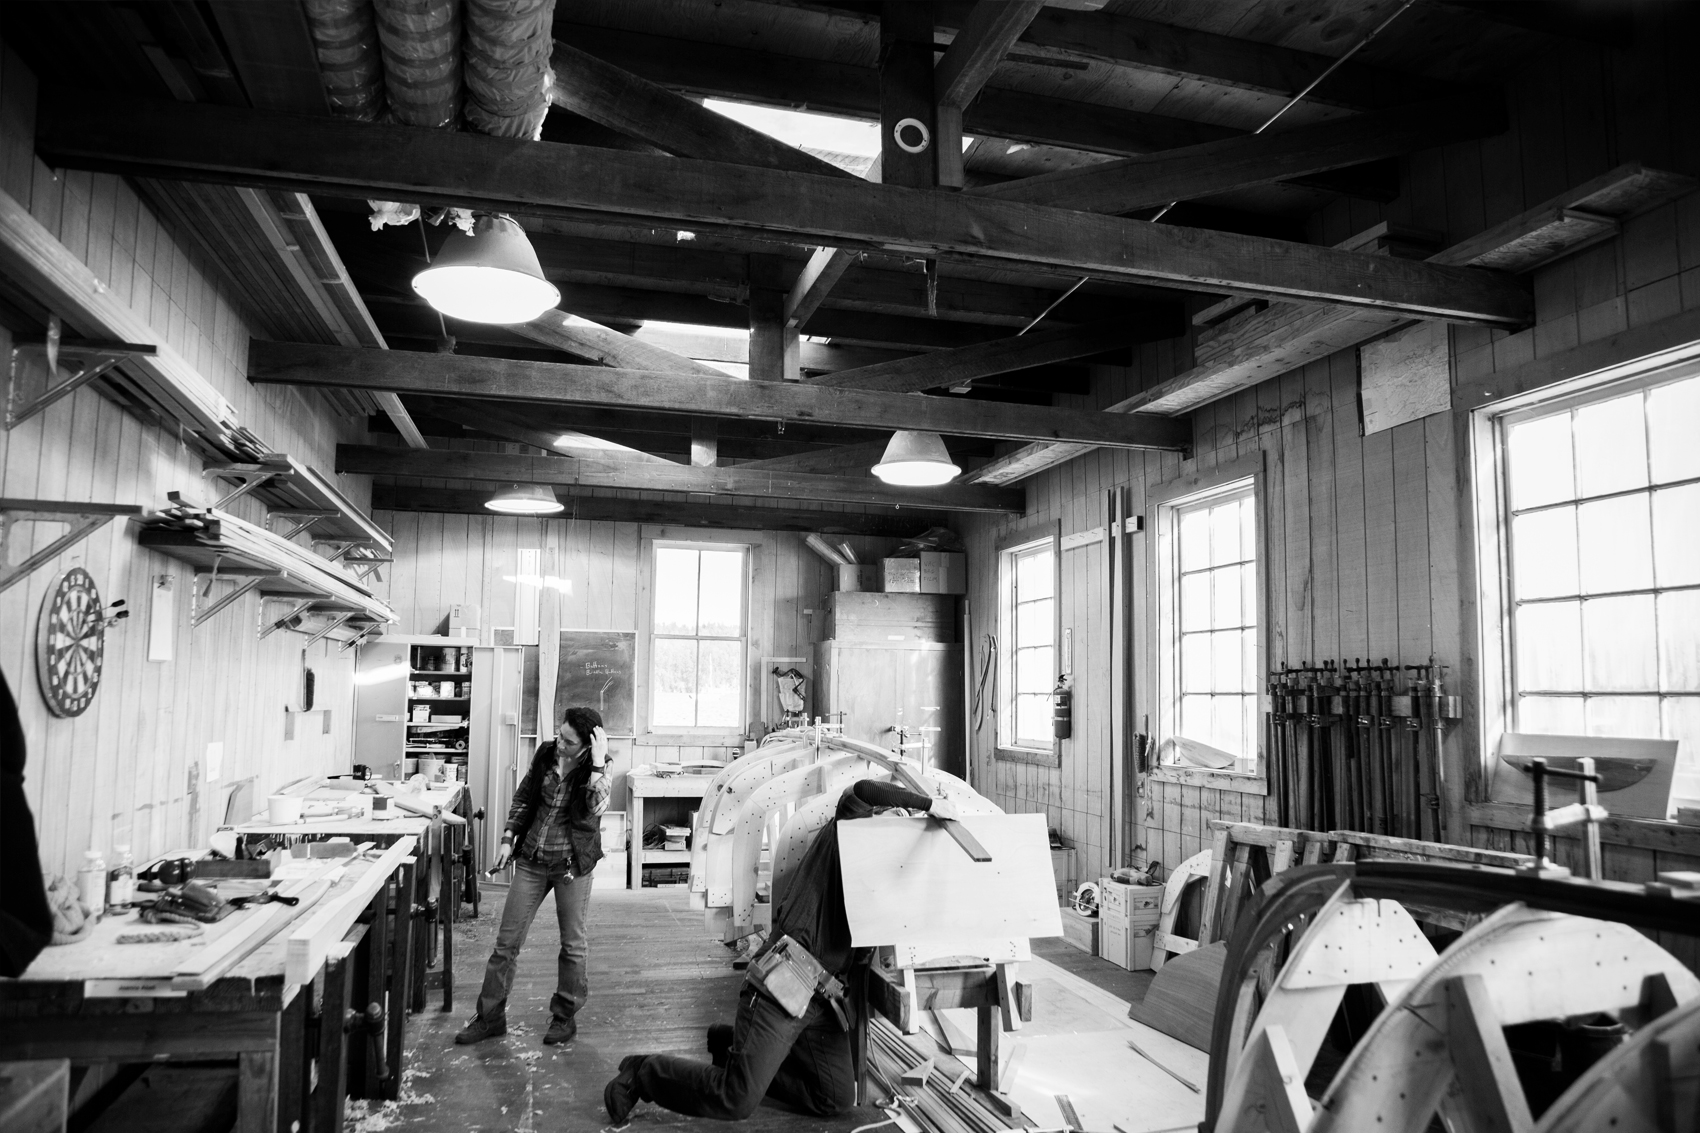
DK: It depends on the project. If we were shooting a little video and there was no client, I think it would have been totally appropriate not to offer any money. Maybe trade some imagery. Edit a little bit of footage together for their website. But if there’s a client involved, that changes things. We negotiated a day rate to shoot in their space, and then I also negotiated a rate with Peter (the boat maker) for his time. It’s sort of a personal preference, but I don’t feel comfortable not paying someone when we have a budget.

CW: We don’t usually come in with an offer. We just explain the project and then ask what they’d like. We’ve never had anyone come back with anything crazy.

DK: Paying people is actually a good thing, because then there’s an agreement involved. You know they’ll show up. If they’re doing it for free, it would be really easy for them to back out at the last minute. Still though, you never know what’s going to happen. You always need to have some sort of backup plan in case something doesn’t work out. What are you going to do if it’s pouring down rain? You’ve got 15 people staring at you like, Now what? Have some thought-out plans so you’re not put into emergency mode.

For example, after scouting Lake Wenatchee, which is where we did all the canoeing and boat stuff, we decided we needed a dock for the plane. So I contacted the lady we were renting the cabin from and asked if she knew anyone. Because it was winter, everyone had pulled their docks in. But she was able to find me a person who had a nonretractable dock, and she sent me, like, 16 photos. I thought, Oh, wow! This is great. It’s going to work perfectly. But when we showed up to shoot, it did not look good at all. To the left and right, there was this red monstrosity of a boathouse. The only way to make it work was shooting straight on. Luckily we had a backup plan: shoot on the beach. All that to say, Plan A didn’t work.

Is there anything about The Journey you would have changed?

DK: I wouldn’t change anything. And that’s because we did so much planning and scouting ahead of time. All of the projects I want to change afterwards are the ones where we were forced into a location, or we were rushed into something and didn’t have time to properly plan. When you have time to properly plan, I think those are the projects you’re going to be most satisfied with.

CW: Scouting is part of the creative process, especially on a film like The Journey. Going to those places helps me become more creative. It became really symbiotic — making a project about exploring helps you within your own creativity.

So I’m guessing scouting for The Journey was a lot different than scouting for From 1994.

DK: One of the biggest differences was that From 1994 was a personal project, so we paid for the whole thing. Originally I thought we could shoot in friends’ houses or maybe even our own house. For that project we ended up looking at, I think, over 20 houses.


What were you looking for?

DK: Mostly the size of the rooms. We needed to fit lighting in all directions and a crew of 10 people, while also being able to move around. You can use a professional location scout to find a house, but we were told it would be $2,500 to $4,000 per day to shoot in some of these houses, and we were going to need the house for about a week. So that was out. We started trying to find houses that weren’t prevetted. We looked on VRBO and Airbnb. I emailed the owners, told them about our project, and asked if they’d let us film. A lot of people said no. But a few people said yes. Anyone who said yes, we’d go scout the house.

CW: In the end it came down to that relationship-building I was talking about before. The main house we rented for the film, we ended up becoming really good friends with the owners. We even invited them to the premier. They were awesome. They keep asking us when we’re going to come back and do our next film. It’s cool to have people like that become a part of your team. They give you this positive emotional support that you’re doing something cool.

We’re given only one light: the sun. That’s the one we use to shape everything else.

DK: That’s also why it’s important to keep a list of your locations. Like, if we ever need a house to shoot in again, we have a house. If we need a boathouse to shoot in, we have a boathouse. That’s so much easier than starting with nothing, which is how we started From 1994. We scouted forever. And even then, the place where we ended up shooting wasn’t really my style.

CW: We brought in all different furniture, props, everything.

Do you think the world is uglier than we realize?

CW: I think it all has to do with light. Often when I walk into a shoot, I’ll shut off all the lights. The producer will be like, “What are you doing?” And I explain that it’s best to start with what’s coming in from outside. It’s better to start there and add, rather than subtract. I forget what filmmaker said this, but they said, really, we’re given only one light: the sun. That’s the one we use to shape everything else. So that’s the mind-set I have when I scout a location. I start with what’s naturally there.

Has scouting so much changed the way you see the world?

DK: I think, more than anything, scouting has helped us hone our style and better understand the things we like. When we scout, it gets us more excited about the things we love; and it helps us make the films we want to make. The more I see new things, the more I want to make films — and vice versa. Scouting opens up creative ideas.

- - - - - -
(Source Article by Music Bed)

8:00AM

A Necessary Guide to On-Set Protocol

Welcome to your first day on a film set.

Perhaps you’ve gotten a new job as a production assistant. Perhaps you’re still in school and have been given an opportunity as an intern, or you’ve recently been asked to help out with a friend’s production. You probably have some questions.

I’m writing this because I’d like to try to answer some of those questions in advance, and because I have hope.

Hope that maybe the next time I ask someone to sweep up some glass that just broke, I won’t have to explain where to get a broom, how to use a dustpan and what to do with the glass once it’s in the dustpan.

Hope that the next time I’m having a time-sensitive conversation with another department head at the monitor, I won’t have to turn and repeat the entire conversation to someone who, rather than listening, was staring at their phone.

Hope that no one on a film set will ever again ask me where to get a ladder. (The answer is the Grip Department. The answer is always the Grip Department).

But Isn’t This Supposed to Be Fun?

This is the biggest challenge that newcomers face: a movie set can look like summer camp. There are cliques, gossip, casual clothing, planned activities and snacks. Many kinds of snacks.

But a movie set is not summer camp, a slumber party or a classroom. It is a workplace.

Here are things I have actually heard new hires say out loud:

“I don’t think that this is worth my time.”

“This isn’t teaching me anything.”

“I didn’t finish it because it didn’t seem important.”

The misunderstanding implicit in all these statements is that the priority of the day is your time, your enjoyment, your feelings, your creative fulfillment or your education. Instead, know this: Every day on a job in film is an opportunity to prove that you deserve to come back tomorrow, nothing else. Instead of asking yourself if you are having fun, ask yourself if you’ve done everything you can to help the film succeed. Instead of asking yourself if something is worth your time, think about why it might be important to others. If you make yourself valuable, you will begin to be valued.

The Metaphor of the Flashlight

Imagine that you are in a dark cave with a group of people, and all of you are running around in different directions. In a corner of the cave is a flashlight, which is spinning through the room.

Suddenly, the flashlight lands on a single person. Everyone stops. Until that person does his or her job, no one can move forward.

At some point during the shooting day, that flashlight will land on you. Everyone will be looking at you and waiting for you to do your job, or the production will stop moving. That flashlight can feel like a warm spotlight or it can feel like the high beams of a speeding car, fixing you in its headlights, determined to mow you down. It all depends on how well you understand your job and the jobs of others around you.

The Art of Proper Presentation

A film set is a uniquely judgmental place. Everyone is relying on each other, so everyone is constantly evaluating whom they can rely on. It’s not enough to do the job, or even to do the job right. You have to do it right and look like a pro while you’re doing it.

Throw Away Your Trash. A film set is a sacred place where creative people engage with one another and make art. Every bag of chips and empty coffee cup left behind is an act of disrespect to the art-making at hand. It is also a blemish on the film itself, as an errant water bottle, discovered too late, renders a great shot useless.

Keep It Tight. Your dress code should prepare you to walk into a CEO’s office or to climb a 14-foot ladder with a paintbrush in your hand. Do not dress like a pirate at a backyard barbecue; do not dress as if you wish to be discovered as onscreen talent. DO wear a belt and keep a complete set of relevant tools at the ready. DO NOT wear open-toed shoes.

Act Your Age. Do not lie down, do not have tickle fights, do not play with swivel chairs, and permanently set your cellphone on “silent.” If you are making other people aware of your presence by doing anything other than your job (laughing, playing a trailer on your phone, chewing loudly), you’re doing your job wrong.

Put Your Stuff Away. Each morning, identify the least obtrusive place to put your coat, your bag and your personal belongings, and then tuck them away in the least obtrusive part of that place. Never on set, never mixed in with equipment and never in another department’s workspace.

Put Your Gear Away. If you can condense your gear, do so. If you do nothing but organize and tighten up your department’s workspace all day, then that is a victory. Someday you’ll find yourself shooting in a 400-square-foot apartment with torrential rain outside and every department will try to cram their gear into the 100 square feet that isn’t being shot first. Practice for that day.

Be On Time. A late person is a person who can’t be trusted, as well as a person who is excluded from important conversations about the day ahead. All aspects of your pre-work routine, including but not limited to parking your car, eating a breakfast sandwich, getting a cup of coffee, putting your backpack away, reviewing the call sheet, checking in with your department, applying sunscreen or inserting foot warmers into your shoes — all of that must happen before your call time. As the saying goes: “If you aren’t 10 minutes early, you’re late.” And if you’re late, you’re fired.

Take Pride in the Details. Present your work in the way you want it to be viewed: with care. If you have been asked to gather information, compile it into a clear, properly formatted list. If you send photos, label them. Park vehicles carefully. Lay out physical options of props, wardrobe or production tools with pride. Spell check your texts. Create searchable subject headings for your emails (“Locations | Swimming Pool Options | Part 1 of 3,” versus “Fwd: some pics”). If you are delivering an object or a piece of paper, put it an envelope and label it. Save your receipts. Download your attachments.

Be All Business. Keep your private business private, and allow others to do the same. Don’t engage in on-set drama and avoid gossip, and you will win and hold the respect of others.

The Art of the Department

Within each crew, one department is always the “problem” department. Their delays are met with scorn, their problems are met with eye rolls, and they are routinely blamed for everything. A reputation as a bunch of screw-ups and goofballs is easy to earn and difficult to dispel. Your behavior contributes to this. You want to have the tightest department on set, something you can be proud of.

Learn — deeply, truly learn — what each department does and what they are responsible for.

The Art of Asking Questions

Of course, questions arise. But before you ask someone else a question, ask yourself:

Is this the right time? What may be your priority in a given moment may distract from a more important priority for the group. If they’re about to roll camera on a scene involving two explosions and a dog rescuing a baby from a dingo, it is not the right the time to ask the first a.d. what time you are breaking for lunch.

Is this the right person? In general, communicate with your equivalent in the other department, not their superior. “Where is the bathroom?” is an important question, but you should ask a locations assistant, not the locations manager. “What is the Wi-Fi password?” is also an important question, but you should ask a production assistant, not the producer.

Can I answer it myself? Obviously, there are many questions that simply don’t bear asking (chief among these: anything that you could find with a Google search).

The Three Kinds of Listening

  1. Not Listening: If there’s a conversation going on that concerns you and your department, be there, listening and interjecting when appropriate. If you can hear a conversation going on that doesn’t concern you, you are either eavesdropping or in the way. If the director is trying to have a talk with an actor and they walk into the room you’re standing by in, politely and subtly exit. The best thing you can do is give people space when they need it and be there when they need you.
  1. Active listening: Active listening occurs when you — individually or as part of a group — are being spoken to directly. You are focused, you are taking notes, you are asking informed questions when it is appropriate. The most challenging active listening takes place in group situations, where you may be on the periphery, such as production meetings, or a morning announcement. Rise to the challenge.
  1. Passive listening, or, Standing By. Standing By means that you are quietly, nimbly observing everything that is going on, waiting for the instant that you can competently step in and positively add to the situation. It means standing (never sitting) quietly someplace out of the way but within earshot of what’s happening, ideally in a position where your department head can signal to you with eye contact if necessary.

Standing By is not talking and joking with other crew members. Standing By is not eating candy at craft services, waiting to be called back to set. Standing By means not calling any attention to yourself.

When you know information about what is happening now and what is happening next without someone having to take time out to explain it to you, you are Standing By correctly.

Standing By is a state of hyper-aware preparedness. Think about the opening of Le Samouraï and the wide shot of Alain Delon’s hitman lying on his bed, with this accompanying Bushido quote: “There is no solitude greater than that of the samurai, unless it be that of the tiger in the jungle … perhaps.” You are that quiet tiger, ready to strike at any moment.

The Art of Following Through

Just as a film set is broken up into departments with specific responsibilities, departments are broken up into individuals with even more specific responsibilities. Your department head has a million things to be concerned with, and their mind must be clear for high-level strategizing and communication. You are there to eliminate their concerns.

When they give you a task, it should disappear completely from their brain because they know that you are completing it. When you complete a portion of a task and walk away before finishing it, you are, very violently — as if the task is an ice pick being thrust into their eye — jamming that concern back into the brain of your department head.

The Art of The Next Step

What comes next? What could I be preparing for now? How can I anticipate needs and satisfy them in advance? What is the next task in a process, and how can I ensure it goes smoothly? You have not completed this day unless you have completely prepared for the next one. If a change occurs, you must think through all the ways that it might affect the future. For example: “If I move this car here, it will be in the way for the next shot. I should not move this car here.” Many people can solve problems; The Art of the Next Step is about preventing them. Those who master The Art of the Next Step become department heads and superstars.

The Art of Common Sense

  • A production is designed to dominate the space around it, and it’s easy to get lost in the bubble. But you are still in the real world. Don’t run into traffic or leave gear in the street. Don’t leave things sitting on the sidewalk unattended.
  • Don’t assume that safety is everyone else’s priority or that everyone else has already thought through the details that you’re thinking through. If you’re the prop master and the passenger side of the picture vehicle doesn’t have a working seat belt, make sure everyone knows that before anybody starts driving.
  • Just as prior to a crash landing you’re instructed to put on your own oxygen mask before helping others, the best way to keep safe is to make sure you’re putting yourself in safe situations at all times.

What To Do If It’s Truly Not Fun

Sometimes, film shoots are awful. Directors lose control; producers are scoundrels; people have bad ideas and worse communication skills.

But it is a rookie mistake to think that this means it is not worth your best efforts. The production world is like a deck of cards, where everyone is reshuffled into different crews, over and over, a dozen times a year. Soon, that worthless director’s assistant may be in a position to tell her new boss not to hire you; five movies from now, that jerk of an electrician will stand in your way when you most need a favor. Don’t burn bridges.

The Art of Being A Hero

Every day, the set chooses a hero — the person who saves the shot, the person who is there in the clutch. Imagine a crowd of people chanting your name in unison, your colleagues showering you with praise for days, the actor who routinely snubs all human contact going out of their way to tell you that you’re the best they’ve ever worked with. If you master the art of work, that hero could be you.

You don’t plan to be a hero. You are just there at every moment, making things better. One of those moments will turn out to be a crucial situation, the moment where the metaphorical flashlight shines on you so bright that you think you might be blinded. And in that moment, you succeed. You succeed with grace, a positive attitude, even humor. That is when working on movies is fun.

Does being a hero mean being the center of attention? No. Being a hero means going above and beyond in each moment to help make the movie better. People who go above and beyond in each moment to be the center of attention, however, are usually regarded as disruptive irritants, if they are regarded at all. Or, we call them actors.

- - - - -
(Source Article by Brandon Tonner-Connolly)

8:00AM

Flipping The Traditional Documentary Model on Its Ear

By Lydia Hurlbut

Shane and I first met Patrick Moreau at Sundance two years ago when they were both speaking there. There was an immediate connection, the kind where you feel like you have known this person forever when you just met. We both realized his talent as a storyteller and independent filmmaker.

Patrick and the entire Stillmotion team have an amazing project that we would like to share with you. We were so moved by the story of #standwithme, that we wanted to dive into the details of this incredible story.

Patrick-Moreau-Namibia-BTS1

Stillmotion is a studio that started in weddings and is now taking on the world with a documentary about child slavery. Stillmotion’s approach to this film has been to create their own path and push the genre of documentary filmmaking. Deciding against Kickstarter and other popular crowd-sourced funding options, the film was largely funded by Stillmotion through their commercial work. With a production budget of $250,000, the Stillmotion team chose this route to remain focused on the film and tied both emotionally and financially to their belief in the impact it could have when released. Their hope with #standwithme was to blur the lines of traditional documentary storytelling. That meant how the story was told, how it transitions, how it looks, and how it sounds.

The Story

Vivienne Harr is a 9-year-old girl who saw an arresting photograph of two enslaved children in Nepal and decided to take a stand. She set up her lemonade stand for 365 days in a row, asking customers to “pay what’s in your heart,” sending proceeds to organizations that liberate and rehabilitate slaves all over the world.

Vivienne-Harr-Make-a-Stand

Patrick directed this project and took the time to share every detail from initial funding through shooting.

Funding

“We got into this film with the idea we could donate our time to a worthwhile cause and help them make a bigger impact. We heard this story of a 9-year-old selling lemonade to fight child slavery and wanted to go down and learn more. It was always going to be a 5 min piece… but when we met them, we knew it had to be so much more. The challenge was that she was making a stand every day – the story was happening now. We thought about Kickstarter but David, our Executive Producer, felt strongly that we should remain focused on the film. As those who have tried crowd funding know, it certainly needs a lot of time and support and our focus needing to be on telling this story.”

“We ultimately decided to dive in and started by tuning the project ourselves. As the scope grew, we formed a corporation for the film and sold stock, or equity, in the film to help fund our remaining production expenses. This was a way to get the support we needed while still shouldering as much of the funding as we could and remaining focused on the film itself.”

Key Tools

“As we approached the film, there were several tools that really helped us push the boundaries of what you’d expect to see in a documentary. Of course, a great tool doesn’t make a strong story, but a strong story that is well told, with the right tools, can be even more effective at impacting the viewer.”

“As a studio, we wouldn’t have been drawn to making a film that was entirely on slavery. Let’s face it, there are tons of dark issues that need addressing, but we wanted a unique angle into the story that would attract a lot of people to see the film, and therefore have a greater chance to really create change. Vivienne was that window. She was the sparkle into the dark, dark world of slavery. Therefore, our approach was to stay in the light – keep the film feeling bright, inspirational, and empowering with a lot of energy.”

Freefly Movi

“Our film’s main character is a 9-year-old. While that means much of what we would be doing would be unpredictable, it also meant we should be ready for lots of action. The Movi would let us get smooth motion, but more than a Steadicam. It would let us quickly and easily get low to the ground (she is 9 after all). It also let us be unpredictable and follow her tricks and turns. More than just following Vivienne, the Movi could be paired with a lot of moving vehicles on our international trips to create a much larger, epic feeling. While in Namibia, we put the Movi in the front of a chopper with open sides and got sweeping scenics that would be much more costly to reproduce in a high budget feature. While one might expect to see a handheld tracking shot of somebody in a documentary, we were able to use a perfectly smooth camera taking flight over the Kalahari is a big, epic, way to open a scene, all for a $1,000 helicopter rental and a Movi Rig.”

Patrick-Moreau-Namibia-BTS2

Canon C100

“Whenever you take on a project of this significance for your studio (this was our first feature length doc done entirely by our studio) the choice of camera is always a big one. We can be tempted to go Red, bigger, badder – but what serves the story? We knew we had to be quick; we had to be able to travel; and we had to be able to shoot very strong visuals with a small crew. The C100 gave us the ability to pack a 24-70, a couple of cheap 32gb SD cards, and a monopod and get very strong event coverage as we travelled internationally. Shooting in Wide DR, we got great latitude in the image (awesome for bright desert shooting), but we also had built in ND filters to control the light, and great monitoring options like waveforms, peaking, and zebras – all which helped us make sure we were capturing the best image possible. With the higher compression of the C100, these guides were huge in getting it right in camera. Adding on the top handle and running audio into camera let us do some interviews with crews as small as 1 or 2. In Nepal, one of the interviews had to be DP’d, directed, produced, lit, and shot by one person. While we had a volunteer stand in as the interviewer for a proper eye line, the C100 let us handle so many duties quickly and get a strong image. The Red can make great images, but it also takes a while to start up and we would be hard pressed to think it could handle the beating we gave our gear, or the pace of our production.”

Canon 1DC

“While the C100 was by far our main cam, we also wanted something that was even smaller for tight spaces and something that could handle the roughest of weather as we travelled. The 1DC was an amazing compliment to shoot high quality production/BTS stills, as well as shooting for the film in up to 4K. As we shot Viv’s lemonade getting bottled, the 1DC was our go to camera, allowing us to get it literally inside the machines as they were running and spinning out bottles of lemonade. As we go back and review the finished film, the bottling scene has some of the strongest visuals. A large part of that is the strong image (wide range, shallow DOF, and low light) all in camera that could go where others couldn’t. When paired with the Movi, we had a lightweight option that we could lift for extend periods. At one point, we had to follow Lisa, the photographer that took the image that started all of this, as she hiked into the Kalahari on a photography trek. It was a 30 min walk out, shoot, then walk back – in the middle of the desert. Remember, we have no AC, no crew . This was one person with whatever they can carry. Being able to put the Movi in majestic mode (it responds to your movements based on tablet settings instead of using a second operator on a remote) and having it light enough let us work without support for extended periods and got some of the strongest shots you now see in the trailer.”

Raymond-Tsang-Ghana-BTS1

Westcott Icelight and Scrim Jim

“Lighting for a doc is always a battle of time and crew. While we’d love days to draw a lighting plot, scout, and setup lights, a doc often comes with all of that compressed into a matter of hours or minutes. We had interviews of some main characters that needed to be sourced and lit (with a crew of 2) in less than 30 minutes – and needed to match those that had a crew of 5 and hours of prep. Using small and quick lighting tools like the Scrim Jim and Ice Light let us make the most of some difficult terrain and harsh outdoor conditions. For several interviews in Nepal, having a crew of only 2, we chose to do interviews outdoors outside of magic hour. This fit best into the production schedule and gave us a lot of context in our interview – we couldn’t travel to Nepal and shoot in an area that didn’t feel like we were there.”

Stand With Me

“On the other hand, the Ice Light is a battery powered daylight balanced LED light that offers a nice soft light. While too dim to light large areas, it is a great helper light for treks into the middle of nowhere. While shooting the Bushmen of Namibia, who live in the Kalahari Desert, we were fortunate to spend an evening with them and experience their medicine dance. Lit by only a fire in the middle of nowhere, we could use the power of the C100 to get great low light images. It was easy for the people to fall into nothing with no power or buildings around. Using the ice light and some 12 CTO, we could get a light place in a tree 15’ away to give us a nice edge light and some separation.”

The Kessler Stealth Slider

“We knew going into this that we were telling a story that would be strong in history. We would want to cover the story of how Vivienne’s story started – something documented daily on Twitter and Instagram with images – as well as the history of how Fair Trade USA started. One of our main characters is a photographer with an incredible body of work, and we’d need to show her images in setting up the story of how ‘the image’ that started it all was taken. We knew we couldn’t try and push how documentaries look and feel while having photos that pan and zoom in post. It was too digital and artificial feeling. Instead, we put the images in real and relevant environments and shot them with a motion control slider. This meant our cuts from one image to another would cut perfectly, and we could get very smooth and repeatable slow shots. When it came to shooting Vivienne’s bottles in stores, we went to dozens of stores and again relied on the motion control to get slow, smooth, and repeatable motion across locations. We shot wide, medium, tight in many locations – all at the exact same speed and direction. In the end, we quickly cut through dozens of shots of the bottles across the dozens of stores, and it all flows so well because of the consistency between shots. Add in some sound design in post (kids playing and laughing over Viv’s photo) for a strong emotional depth and compelling visuals of what could have easily just been a photo zoomed in post.”

At its core, #standwithme is a social invitation for people to stand against slavery and invite others to join in doing so. Stillmotion’s hope for this trailer is not that you’ll go out to see this film because it looks like a good movie. Their hope is that 30 million human beings is something you can’t turn away from, and that this trailer will leave you wanting to know more about the issue and how we can all do our part to truly put an end to this suffering.

The #standwithme Premiere Tour will be hitting the road in February, taking the film to 30 cities in the US & Canada. But there’s another tour we think you guys will be even more excited about…

Storytelling With Heart

The Storytelling With Heart Filmmaking Workshop!

The Storytelling With Heart Tour is a one-day filmmaking workshop all about how to use your talent and passion as a filmmaker to tell the stories you REALLY want to tell, and tell them powerfully. The workshop will take place on the day following the #standwithme premiere in each city.

In addition to a live Q&A from #standwithme’s directors Patrick Moreau and Grant Peelle at each premiere, there will also be an educational workshop held the following day in each city, known as the Storytelling With Heart Tour. The workshop tour welcomes anyone who is interested in independent filmmaking and telling meaningful stories, and will be an opportunity to get hands-on instruction and insight from the Stillmotion team on their filmmaking process. Each workshop will run from 9 am-5 pm, on the day following the premiere of #standwithme.

Visit www.Stillmotionblog.com for more information on Stillmotion’s education program and to purchase tickets to the workshop. Use the discount code hurlbut10 to get 10% off of your registration fee. (Code expires December 31, 2013.)

Our friends at Stillmotion put a lot on the line to make #standwithme, but there was never really any question as to why they kept going. They believed in the story, plain and simple.

If enough people are made aware of just how much power they have to stop slavery, even though something as simple as a shift in shopping habits, a global commitment can be made, and together we can make a vital mark. We are proud to be inviting you to stand with us.

Stand With Me

- - - - - - -
(Article Source)

8:00AM

You've Landed Your First Video Job

You’re fresh out of school. You’ve been waiting for this moment for four years, and now it’s happened: you’ve landed your first corporate client. What next? Here are some tips to help you kick things off.

Build your brand

By brand we mean how your company appears from the outside, and what it stands for. A strong brand makes you look credible and helps to create a memorable business that people want to be connected to. Pick a name that stands out, and is related to what you, in particular, offer. Using your own name as a brand is more personable but will potentially attract smaller clients. Also, consider the simplicity of the name: is it easy to remember the corresponding url or twitter handle?

Developing a visual identity is just as important, get a great logo and share it everywhere. Think about corresponding design elements (color, typography, shapes). Finally, a tagline goes hand in hand with your logo and is your promise to your audience - can you explain what you are and what you do in about 7 words?

Promote yourself

When you’re first starting out, you can’t just sit around and hope people will come to you. You need to build a credible online presence.

First, get your website set up. No html or java experience? Fear not. Companies such as Wordpress, Wix, or Squarespace offer stylish and easy-to-use pre-packaged sites.

Next, get your Facebook and Twitter (and other social platforms) presence going, and make sure you post to them regularly. Even if it’s just a “Hey, see what we just did for our latest client!”, or “Check out the new service we’re offering”. This way, clients are always being reminded you’re there and can watch you develop.

Finally, word of mouth is always the best advertising. Every time you deliver a project and see a smile on your client’s face, ask them if they know anyone who might need your services and encourage them to recommend you.

For a few more tips, check out 5 keys to growing your freelance business.

Get your business incorporated

This might sound like a boring bit of admin, but protecting yourself as an individual, or as a husband/wife/parent is critical. When you’re incorporated, if someone sues you for professional reasons, they will be suing the business, and your personal assets will be protected. As a small business owner, you are subject to some of the laws and tax regulations that apply to large corporations. In addition to incorporation, make sure you check out the tax obligations in your location.

Pick your software

While your expertise and comfort levels might guide your software decisions, your budget will also come into play. FCPX (Mac only) is a flat $300 fee, while both Adobe’s Creative Cloud and Avid Media Composer are available on a $50/month subscription plan. Keep in mind that some programs are Windows only (including DVD Architect, pretty much the last prosumer DVD authoring program).

To work out what you need and the best way of buying it, sit down and make a road map of the type of services you’re planning to offer in the first twelve months of your business. Then list the applications you’ll need to do each service. For example:

Jan – April:
Web file creation – Sorenson Squeeze, $X
DVD authoring – DVD Architect, $X
May:
3D animation – Cinema 4D, $X

You may decide that you won’t offer all services right off the bat, as they’ll require more cash up front on software. Update and refer to your roadmap regularly to prepare for the next phase of your business.

Storage

It’s crucial to choose the right storage platforms for the work that you’ll be cutting. Many new editors think, “I’ll just get a large system drive and edit off that!”. Bad idea. You should never have media on the same drive as your OS: if your hard drive is damaged, you’ll lose all your files. G-Raid Technology and La Cie are excellent starting places; they have a range of drives covering a selection of interfaces.

The demo

There is a slight difference between demo reels and a showreel, and both are important. A showreel showcases the range of work that you’ve done and is edited in a snappy, creative way. A demo reel shows the work you can do in more detail and with longer segments, giving clients a clearer understanding of your style of editing. Your demo reels will help potential clients decide if you’re the right fit for the post production on their next job. If you’re an editor that works on different types of productions, make sure you have demos that show each genre.

Manage client expectations

As soon as the project begins, you need to establish some guidelines to ensure things stay on track. Without these, you’ll be surprised at how quickly things can unravel. Develop a timeline and agree on a communication schedule (with all key stakeholders!) and milestone reviews  – this way the the client can leave you to do your work, knowing they’ll be brought in at critical junctures. Finally, once you’ve set attainable deadlines, stick to them. Never over promise and then under deliver – this is a sure recipe for disappointment all round.

Quoting and billing

Consider charging per project instead of per hour. This gives the client peace of mind around the project budget but also, if you work quickly and efficiently, means you don’t risk devaluing your expertise on an hourly rate. A Statement of Work shows that all parties have agreed upon the deliverables and the project price (and anything outside of that will increase the price of the project).

When billing, consider using invoicing software to give you a professional look and make sure everything is calculated correctly. Freshbooks or Xero will help track your clients and the amount of money you are owed. Make sure to include a due date and full details of your preferred payment method on every invoice you send.

Golden rule

Lastly, the most important thing to remember is never work for free. Your time is valuable. A credit in someone’s movie or TV show doesn’t pay your rent, or the lease on your equipment. Don’t be afraid to ask for what you feel you deserve. You might lose a few clients, but the ones you deliver for in exchange for a fair price, will be clients for life!

Kevin P McAuliffe is a three-time North American ProMax award-winning editor and has been a media composer editor for over 18 years. He is a senior editor at Extreme Reach Toronto, whose current clients include Paramount Pictures, Warner Bros. Pictures, Walt Disney Pictures and E1 Entertainment. Kevin can also be found helping out on Avid Community in the Media Composer and Symphony Get Started Fast forums.

(Article Posted by Wipster)

8:00AM

Video Background Music

Background music can do wonderful things for your video. It can help create emotion, drive the pace and flow, and even hide pesky audio edits. But counter to what you may believe, the most successful background music is the music that you didn't even know was there.

0:39


CC

If the volume is too high, the music will overpower the spoken narrative of your video. This… is no good. If background music is too low, it can paradoxically draw attention to itself by making the viewer strain to hear it. The goal of background music to invisibly assist your video, not create a distraction.

Mixing the music volume in your video takes practice, and there's no exact formula for what level the music should be relative to the voice. It's all about training your ears to feel when the music is sitting just right in the mix.

To start your training, play around with this interactive volume video and try to listen for when the volume sits right in the mix...

READ THE FULL ARTICLE

8:00AM

10 Tips from Editors to Directors 

Jonny Elwyn follows-up his popular article on what editors want camera operators to do to help out the process with an equally illuminating piece, this time focusing on the director/editor relationship.

My first article on Redshark News, 11 Things Editors Wish Camera Operators Always Did, seemed to have resonated with quite a few folks, so I thought I'd put down a few more thoughts on the complex creative marriage that occurs when directors are working with editors.

As with any close creative collaboration, personality, experience and personal idiosyncrasies all play a role in shaping how successful the union will be. Sometimes those differences create insurmountable conflict; other times, cinematic magic. But it is the professional editor's role to be what the director needs them to be at any given moment, and although the editor does have the opportunity to shape the final product in momentous ways, his-or-her work should ultimately all be in service of the director’s vision and producing the best possible end result.

With that in mind, here are 10 suggestions for directors on how to get the best from their editors.

1. It's a collaborative effort.
That means I want to bring all that I have to contribute to the project. I want to engage you in lively debate about the best way to shape the project. I want you to be open to trying new ideas and new approaches. I don't want to you to see me as only a button monkey.

2. What you have isn't what you had.
The editor is the one who has to stand in the gap between what the director thinks they have or wishes they had, and what they really have. We can only cut the footage you shot. Our job is to bridge that gap as much as we can.

3. Don't tell me when to cut.
No clicks, claps, points, taps or shouts please.

4. Leave me alone.
I need time to get on with things without you in the room. To get organized, watch through the footage, find the takes I like, try things my way, try crazy things that just might work but probably won't and to have the freedom to take a crack at things without wasting your time.

5. Be available.
If you're on the phone all the time, it's hard to collaborate. I'll need some quality time with you, at the right time, to help get your feedback, thoughts and collaborative energies in a focused way. You're the director after all - it's your project.

6. Be specifically general.
When working with actors it is common practice not to tell them you hated it when they said this word in that way. You'd say "once more with feeling." With an editor, if you say "the scene feels like it lacks energy," then I can go away and do things to amp it up a bit. If you say shave 5 frames off this shot and cut in here rather than there, things tend not to work out so well. Let me fix the note in the spirit of the note.

7. Be generally specific.
Towards the end of a project, it's OK to get more specific and granular with the details of your feedback. We want to make sure you get what you want and sometimes it's easier just to sit with you and give you that, especially if either option is a viable one.

8. Do not touch the screen.

9. Share Your Wisdom.
As an editor I've learnt much of what I know about filmmaking, narrative structure and creative ju-jitsu from the directors I've worked with. Your patient sharing of hard-won wisdom is gratefully received.

10. We sometimes get things wrong.
Usually spelling. I also think my most frequent fault as an editor, when collaborating with a director, is to dismiss an idea as one that "I've already tried and it didn't work…" Instead, I would be wiser to walk through the director's version of the idea once again – either to put to rest that it really won't work, or to be pleasantly surprised that it does.
- - - - - -
(Article Source)


8:00AM

Helpful Ways to Get a Grip on Lighting

By Bobby Marko | July 31, 2014
(Article Source)

I spent the 1st half of this year releasing two films, a feature length documentary and a short film narrative (Becoming Fools and Fruitcake respectively). Through this process I've attended screenings and festivals of our own films and for others. I've also sat through several Q&A's with independent filmmakers and although I love hearing how other creatives move through the process of producing their work I sometimes get increasingly frustrated with the fact that camera gear takes such a center stage while lighting, composition, sound design and production design take a distant back seat.

As important as camera and lens choice is for your production lighting, audio and composition are equally as important. I've seen quite a few films shot on RED, Alexa and high end Canon and Sony cameras that looked awful. They should have saved the money they spent on those high end cameras and lenses and invested in lighting and shot on a dslr, it would have at least looked better.

Many times in the moment of my irritation I thought about firing off a social media post to make a quick statement. But I thought it best served to compile my thoughts and turn these points into teachable moments. I'll try not to make these posts long, there will be a few of them. But I want to make these tips easily digestible and things you can put into practice immediately.

Lighting Tips for Cinematographers

Part I: Foreground and Background Exposure

A common mistake I see with independent and young Filmmakers is not knowing how to light their scenes for foreground and background. Often they rely on setting a low aperture from their lens to create depth. However, properly setting your exposure for your foreground (or subject) and background will create the same affect and give you more options with your camera.

The general rule of thumb is to set your key light one step higher than your background. Of course there are some variations to this rule depending on style and genre. But I want to burn that rule into your brain, my subject must be lit one stop higher than my background. Say that to yourself until it's the first thing that comes to mind when your gaffer asks you "how do you want to light this?"

Now, how do you do this? Very simple, get yourself a light meter (I don't care if your gaffer has one already, every cinematographer should have one in his or her dity bag). Even if you have an app such as Cine Meter, it's still a tool to aid you. Which ever you have, learn to use it (I'm not going to go into depth on how to use a light meter, there are plenty of YouTube and blog posts covering that subject) and then once you have a simple lighting rig set up meter your subject. Let's say for example you get a reading at 4.0. Remember that and then move to your background. Find a flat area that faces your camera lens and meter that area. You should get a reading of 2.8. If not then adjust your lighting respective to your reading. If the background reads 3.2 then your a half stop too high. Consider a half scrim or pull your lighting back (or dim a half step if you have that ability). If you're reading is 1.4 for the background then you must increase the power. Sometimes you have to adjust your key light in order to get the proper setting but no matter which method you have to employ, once you have this set, you will have a proper foundation to start with lighting your scene. Now, let's look at some examples.  


Shawshank Redemption (1994) Roger Deakins - DP

Here is a clear example. We have the subject that is not too far from the bookcase behind him in the background but notice how Roger Deakins (DP) lights the subject at least one stop above the background. Had he lit the background as much as the subject, even keeping the same depth of field, the image would have been flat and the focus for the audience would not have remained on the subject. 

Helpful Ways for Cinematographers to Get a Grip on Lighting
We Are What We Are (2013) Ryan Samul - DP

Here's another example where Ryan Samul uses the same principle. His subject is lit at least 1 stop above the background, even though the texture is great, it's not the focus of the scene so he chooses to keep the background dimly lit. Now, as I mentioned before employing this method is a start. Sometimes you want your background to play a role in the scene as it conveys an importance in relationship to the foreground and.or subject. So let's look at some examples as to when this rule can be broken.

Helpful Ways for Cinematographers to Get a Grip on Lighting
The Big Lebowski (1998) Roger Deakins - DP

Here you see the background of the grocery store obviously lit much higher than the subject. And if you also notice the angle in which Deakins uses the store shelves, starting in the foreground and moving towards the background. This is to show the deep philosophical nature of  "the Dude" in the opening scene. It's also to establish the environment in where he is. No one is around, he is isolated. You can assume that it's the middle of the night when most people are not at grocery stores. So there's a ton of information you can gather from this one shot and a reason why sometimes you want to break the one stop rule when lighting foreground and backgrounds. But at least you can see the lighting is not even so there is still depth to the scene.

Helpful Ways for Cinematographers to Get a Grip on Lighting
Book of Eli (2010) Don Burgess - DP

Now here is a shot in which Don Burgess decides to blend the characters in with the background. Both the subjects and background are nearly in focus and lit almost the same. Why? Many times you want to submerse the viewer into the world in which your characters are living and here is a good example of that. This method of even lighting allows the audience to get a sense of the environment in which the characters are currently in. But notice there is still a lot of light and dark, between the object, even on the characters who are lit from only one direction. Burgess still employed depth but just from a side to side and not in Z space.

Like with most anything creative, there are rules to break and the "one stop" rule with lighting is certainly no different. But learn it first and then use the creative process to know when and how to break it.
- - - - - -
(Article Source)

9:51AM

Shoot Like an Editor

I believe that both directors and camera operators would  benefit from learning to be great editors. If you don't know how it will fit together in the end, then how will you know what to film when you're under the daily pressure on set?

Here is a short video I ran across that shares a few tips!

8:00AM

Who's Who on a Movie Crew

Here is a fun short film that describes the key positions on a movie production.

"Making a video can be a one person production but the more elaborate your ideas get, the more likely you'll need a crew to execute your vision. In this video, we give you a rundown of the basics of how all the work is divided up on a basic crew."

...see the full lesson HERE!